4.9 Universal Connector Tutorial
Introduction
Welcome to the tutorial on Trustle's Universal Connector! This tutorial will focus on how our clients can utilize this Connector for a wide range of smaller web applications. This Connector uses a manual form of access management. That means clients will still be responsible for all forms of granting and revoking access on their 3rd-party tool. Trustle will help to remind you when to grant or revoke access, to keep a detailed log of events, and much more! To showcase our features, we will connect Jira on this tutorial. You can follow along with any other tool where you plan to track access of your Users and Groups.
Trustle's Universal Connector
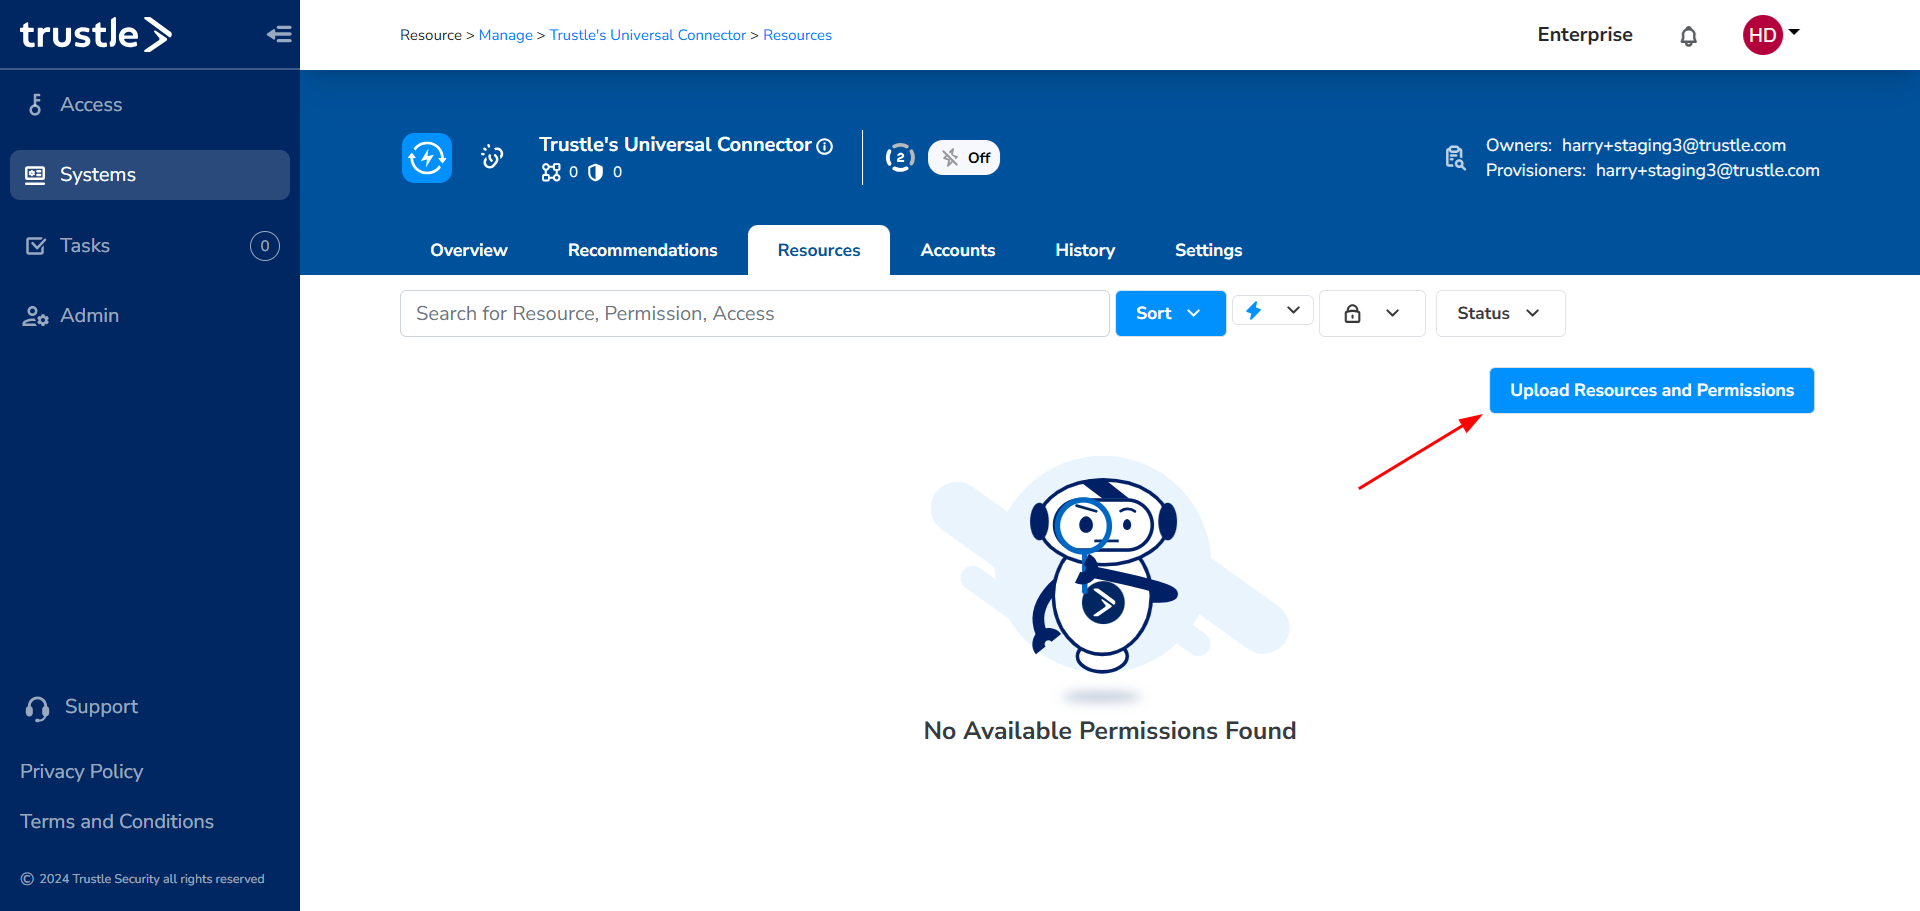
Let's begin by creating a new Universal Connector System. Head over to the Systems tab, and select "Add System". Find the Universal Connector in the options, and fill out the information to complete the creation. You will see the new System page once done.
Resources & Permissions
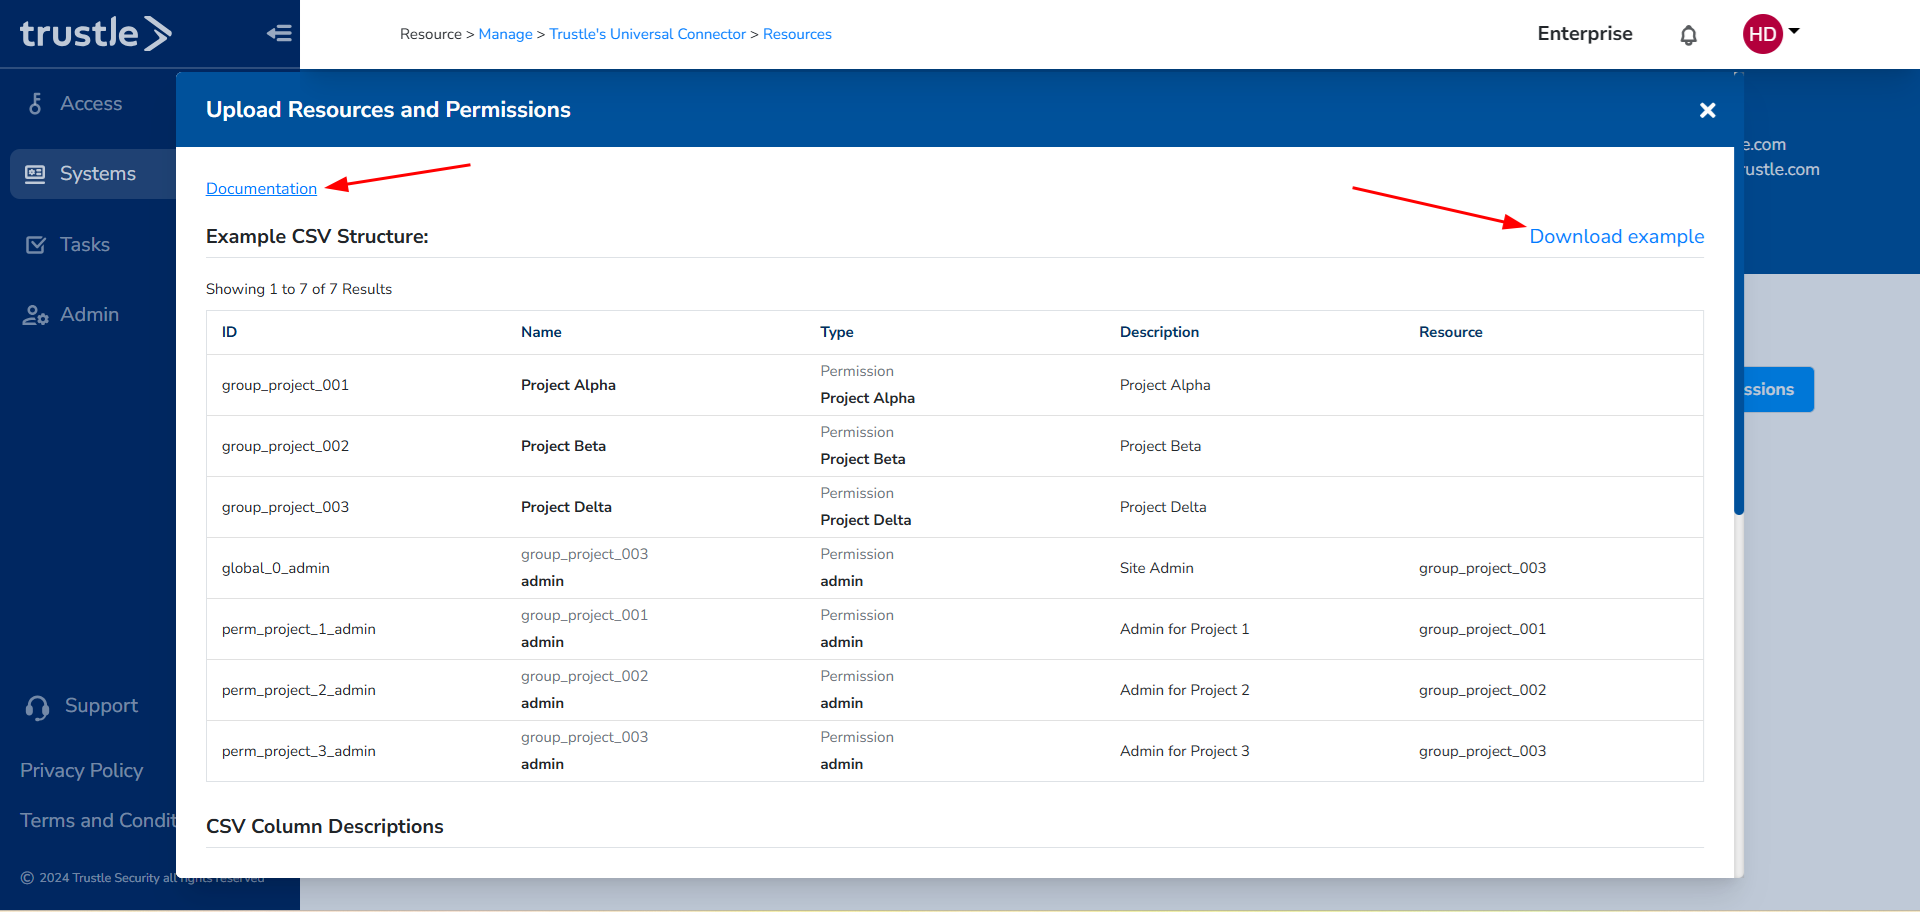
Next we will add Resources and Permissions. Trustle requires a specific format for the Resources and Permissions CSV. You can find an example of this after clicking on the "Upload Resources and Permissions" button. Trustle can also provide a code script for certain tools that can automatically transfer the initial CSV to Trustle's format. Contact us if you would like to inquire about this.
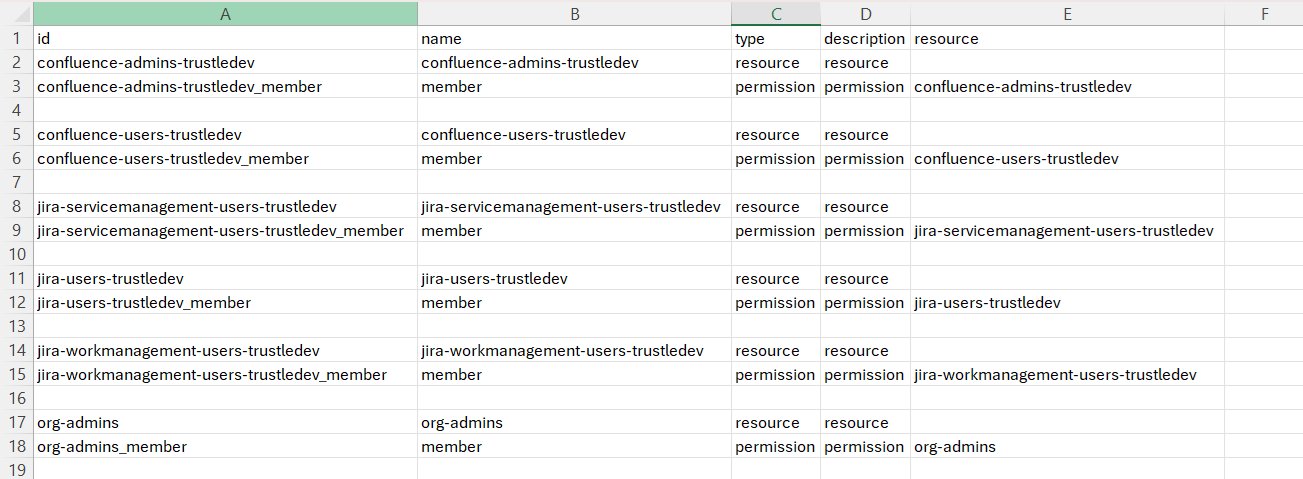
For our Jira example, I download the full list of Groups from Jira that I plan to use with Trustle. These correspond to the Resources that Users can access. Using our code, I transfer that list to the proper Trustle format. I also create a Permission under these Groups called "Member" that my users will request access to. You can also create other Permissions under your Resources if you like. Here is an example of what this Resource & Permission CSV looks like:
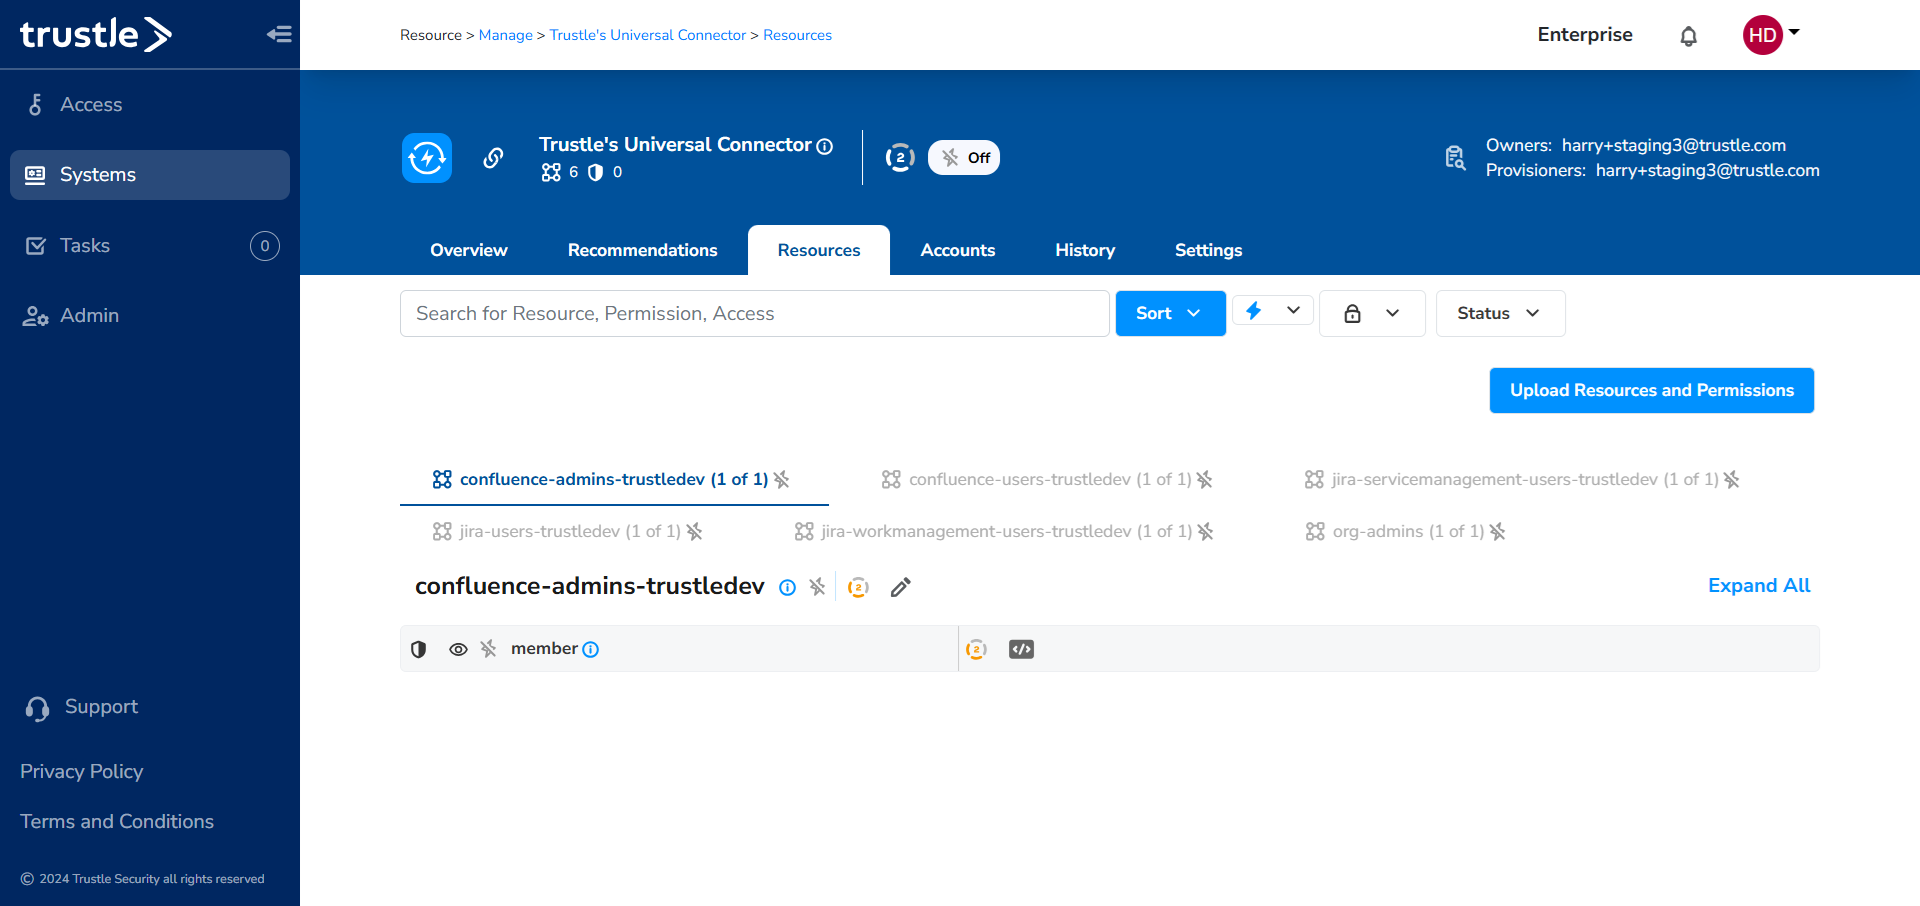
Once this CSV is uploaded, I can see the Resources and Permissions on Trustle.
Accounts
With the Resources and Permissions completed, I now focus on the Accounts tab in Trustle. We need to do the same thing and get an Accounts CSV ready. Back in Jira, I download the list of my Users that will be making requests. Click on the "Upload Accounts" button to see another example of Trustle's format for this CSV.
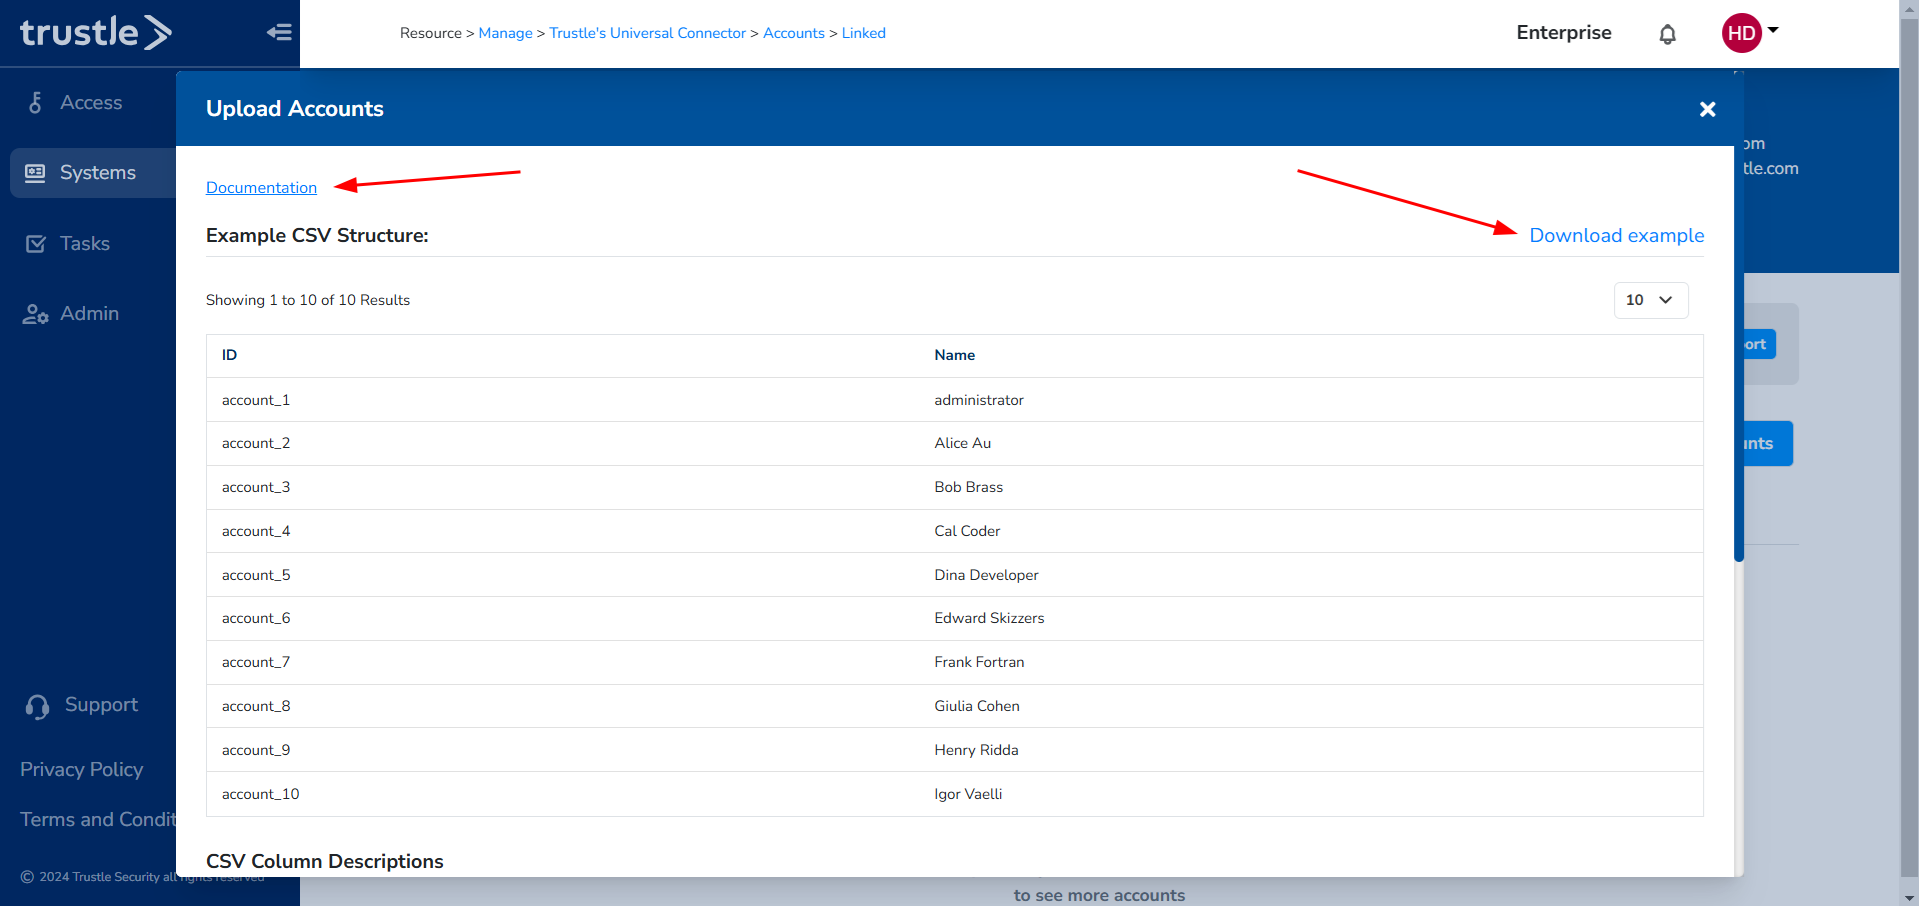
After formatting my Users correctly in the CSV and uploading to Trustle, I can now see my accounts.
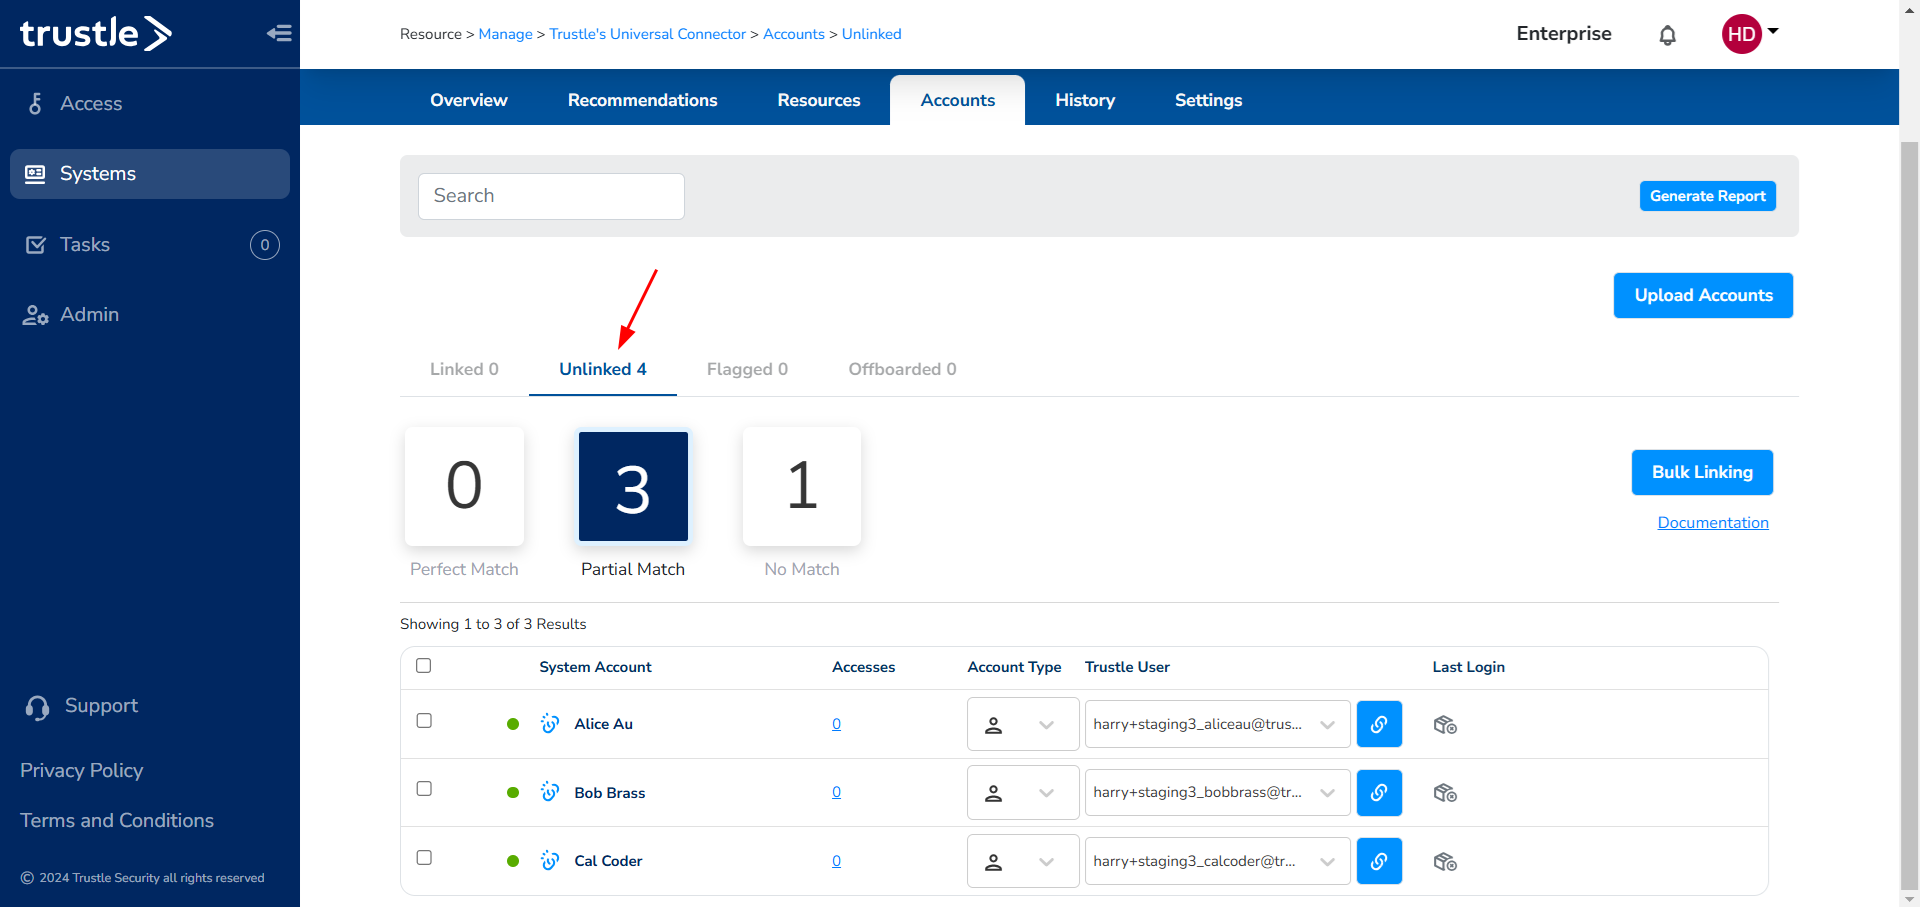
Like all Account uploads in Trustle, these Accounts begin in the Unlinked tab and need to be linked to a Trustle User. Trustle Users are created in the Admin page, and you can see our Introduction Tutorial for more help on this step. Head over to the Admin page and create a Trustle User to link to your new Accounts. Activate this User by sending an email invite. I will create an "Alice Au" user and activate her. Now I can link this new Alice User to her Account on the Universal Connector. Alice is now ready to make a request to one of the Resources.
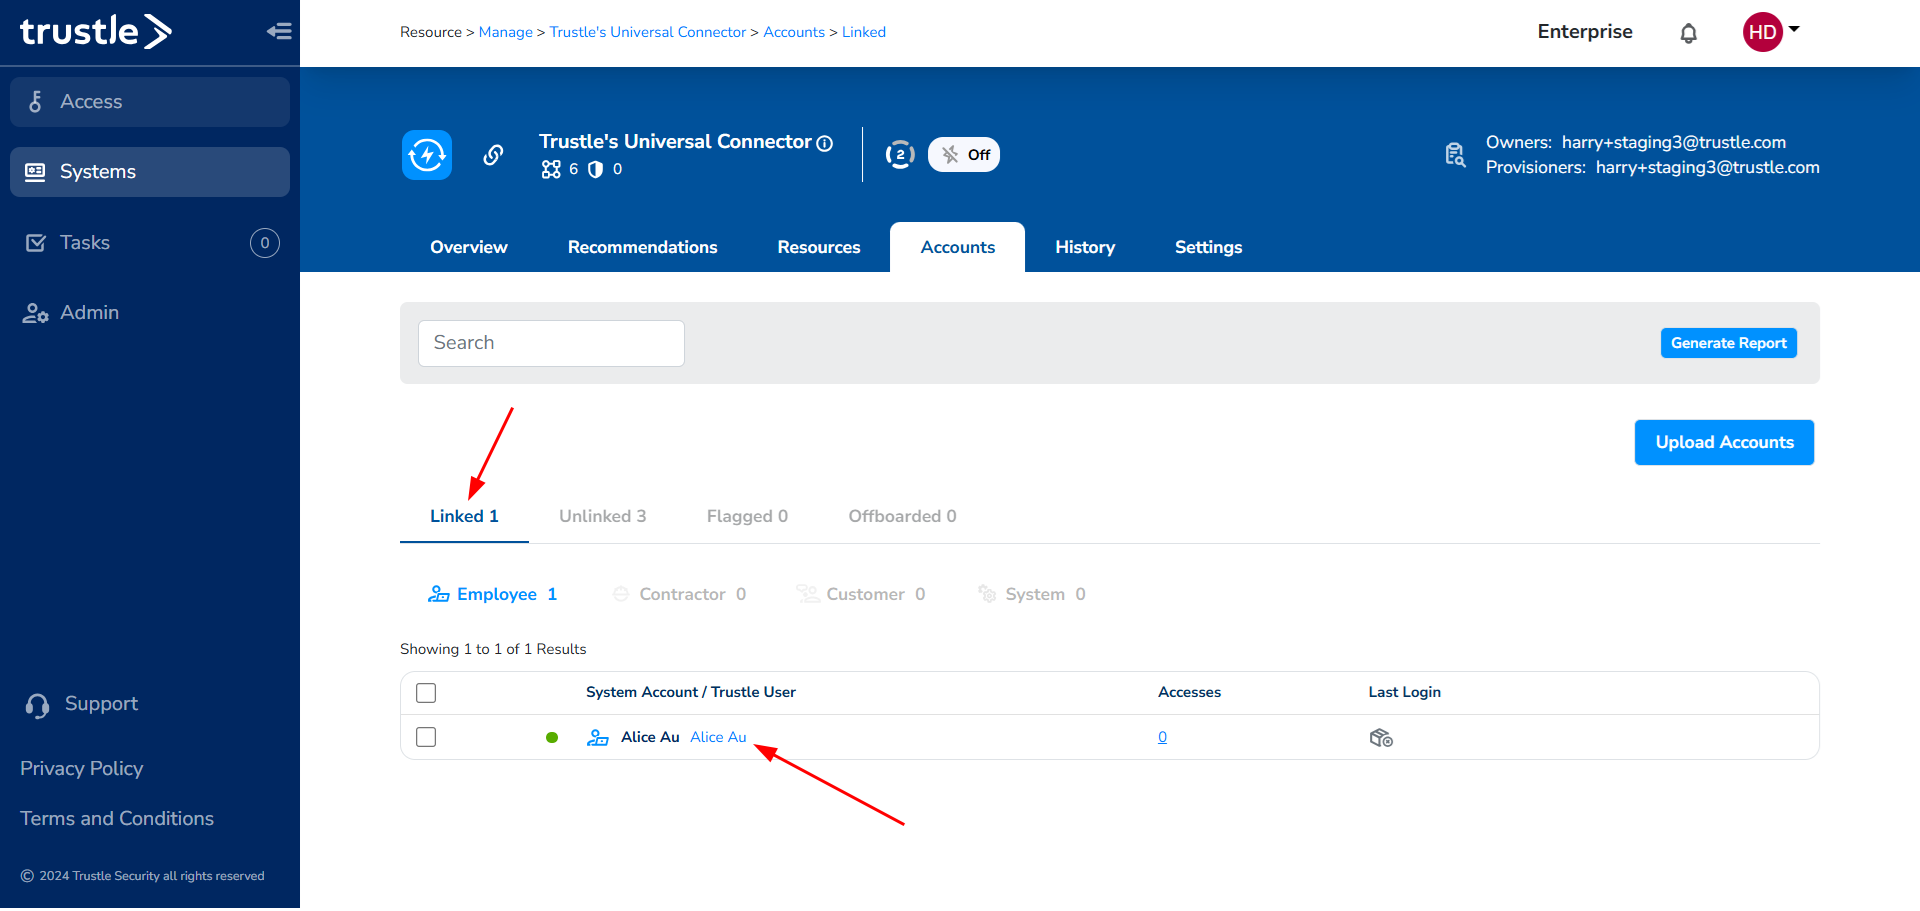
Update: Trustle now also provides the ability to move your current Trustle Users to Accounts in the Universal Connector. This allows for Admins to create new accounts without having to constantly update the Connector with CSVs. For example, you can bring in Trustle Users from your identity provider, then transition them in to the Universal Connector. You can find that button here:

Settings
Be sure to change your Universal Connector's Settings to ensure that manual provisioning is working.
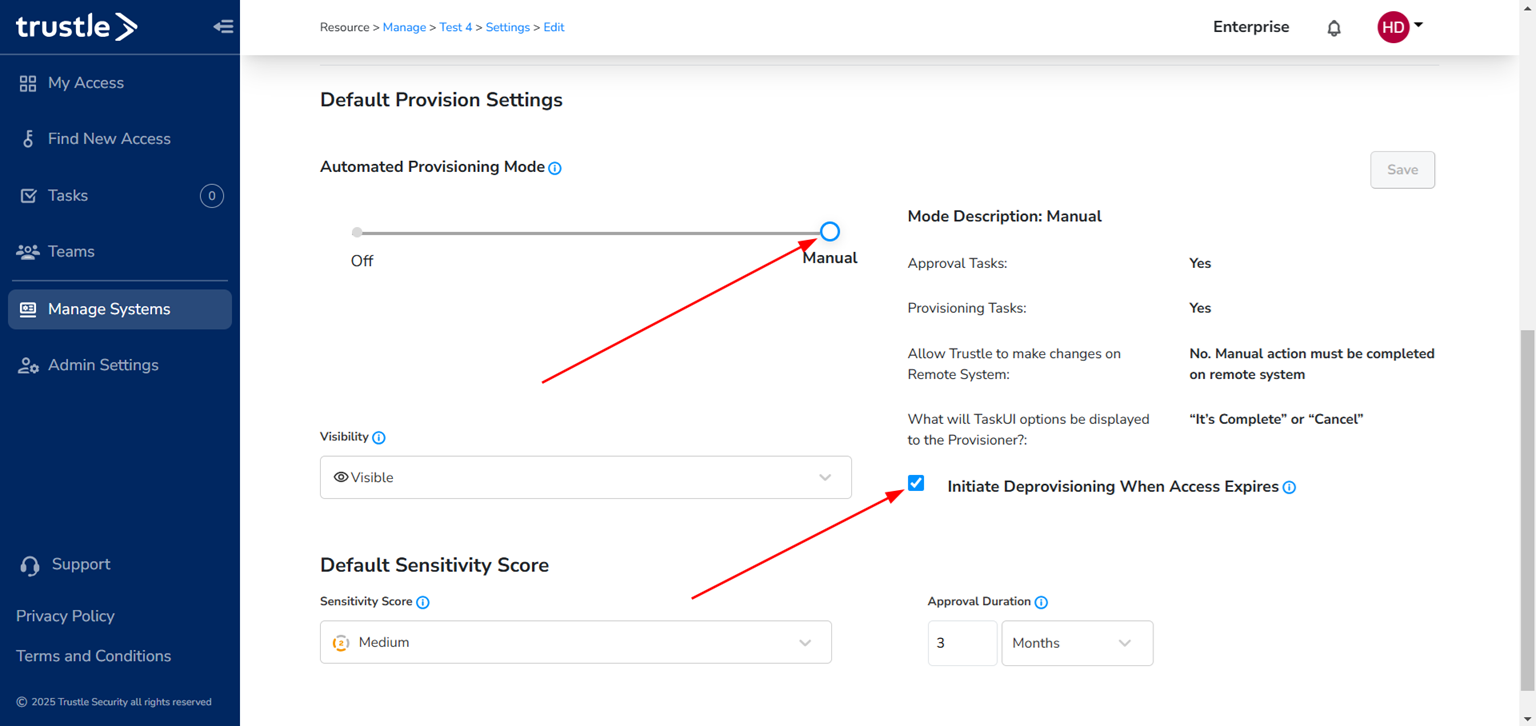
Your Universal Connector is ready to go! Your linked Users can now request to Resources on Trustle and the Manager will get requests to grant that access. We look forward to helping you track all your Access Management with Trustle.