4.8 Authority Tutorial
Welcome to Trustle's Authority Tutorial!
This tutorial will showcase how users can rotate between different Authorities in the Trustle tool. See Trustle's Authority Page for the theory of operation on Authority.
Trustle User Import
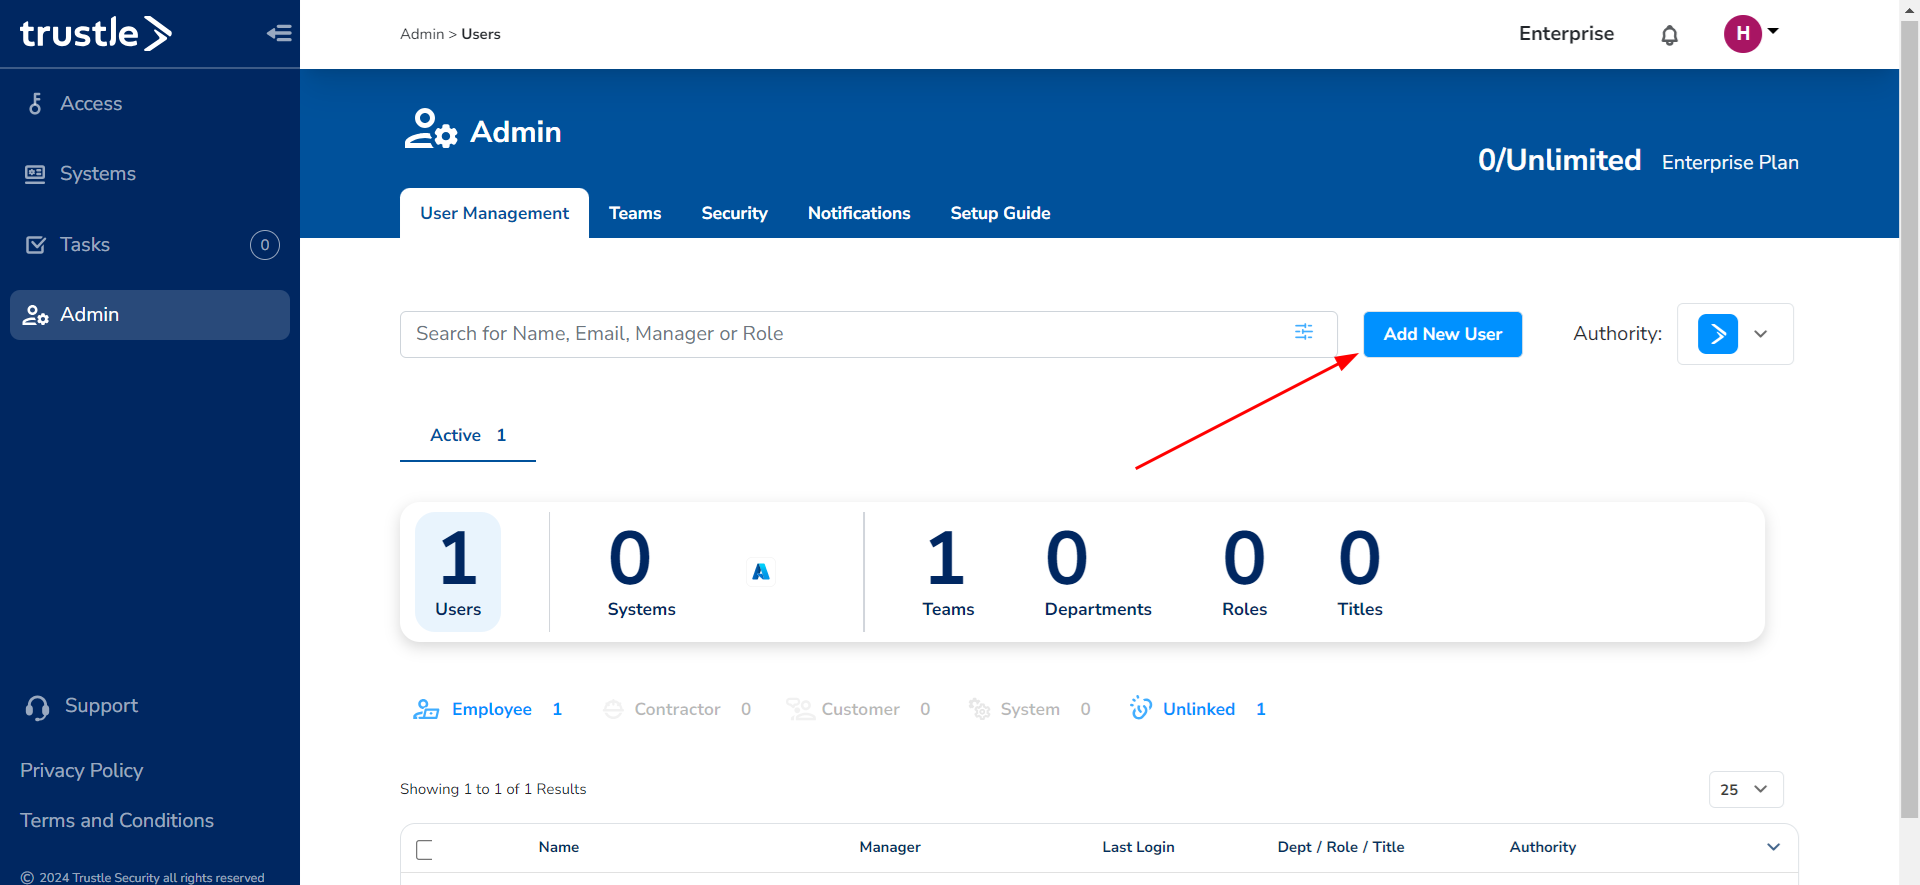
We will start off by bringing in Trustle Users from Manual Import. Once you have your new account, head over to the Admin tab and select the "Add New User" button.
In the Pop-Up, add these three users. Their email will correspond to your Email. I will use my Email "[email protected]" as an example. Based on my email, Alice's email will become "[email protected]".
- Alice Au, [email protected]
- Bob Brass, [email protected]
- Cal Coder, [email protected]
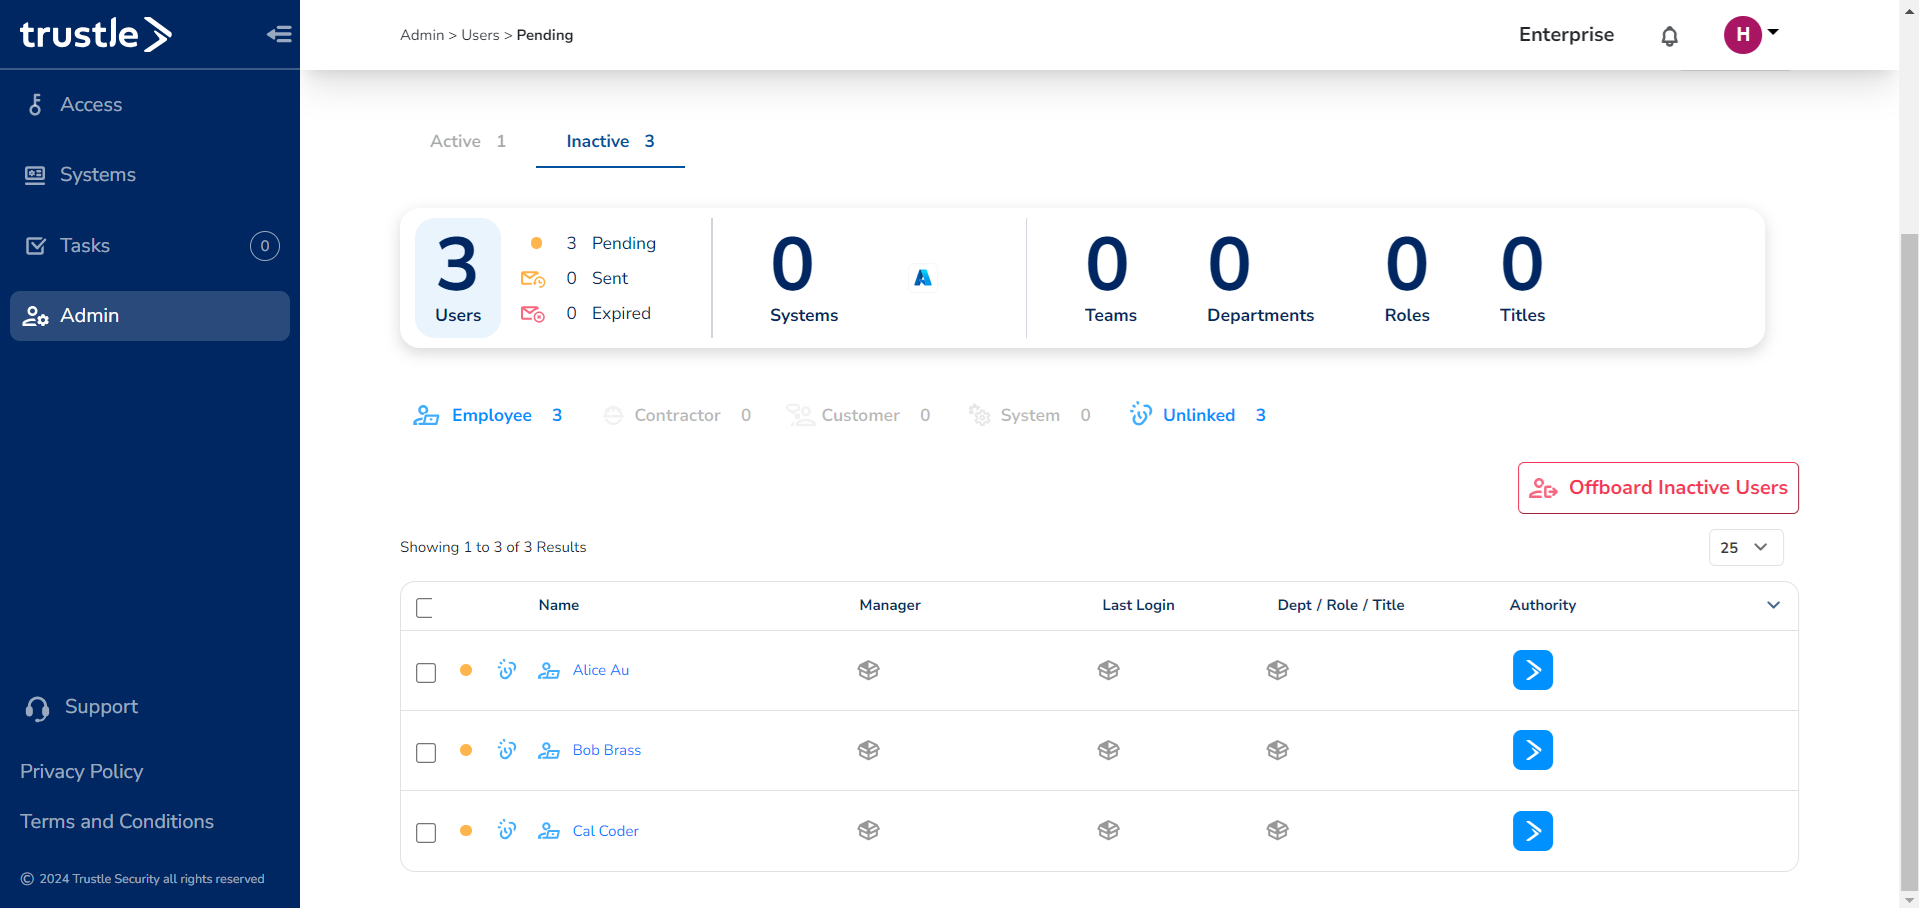
Fill out their Name and Email and click "Add New User" at the bottom. You should now have 3 Inactive Users which will look like this:
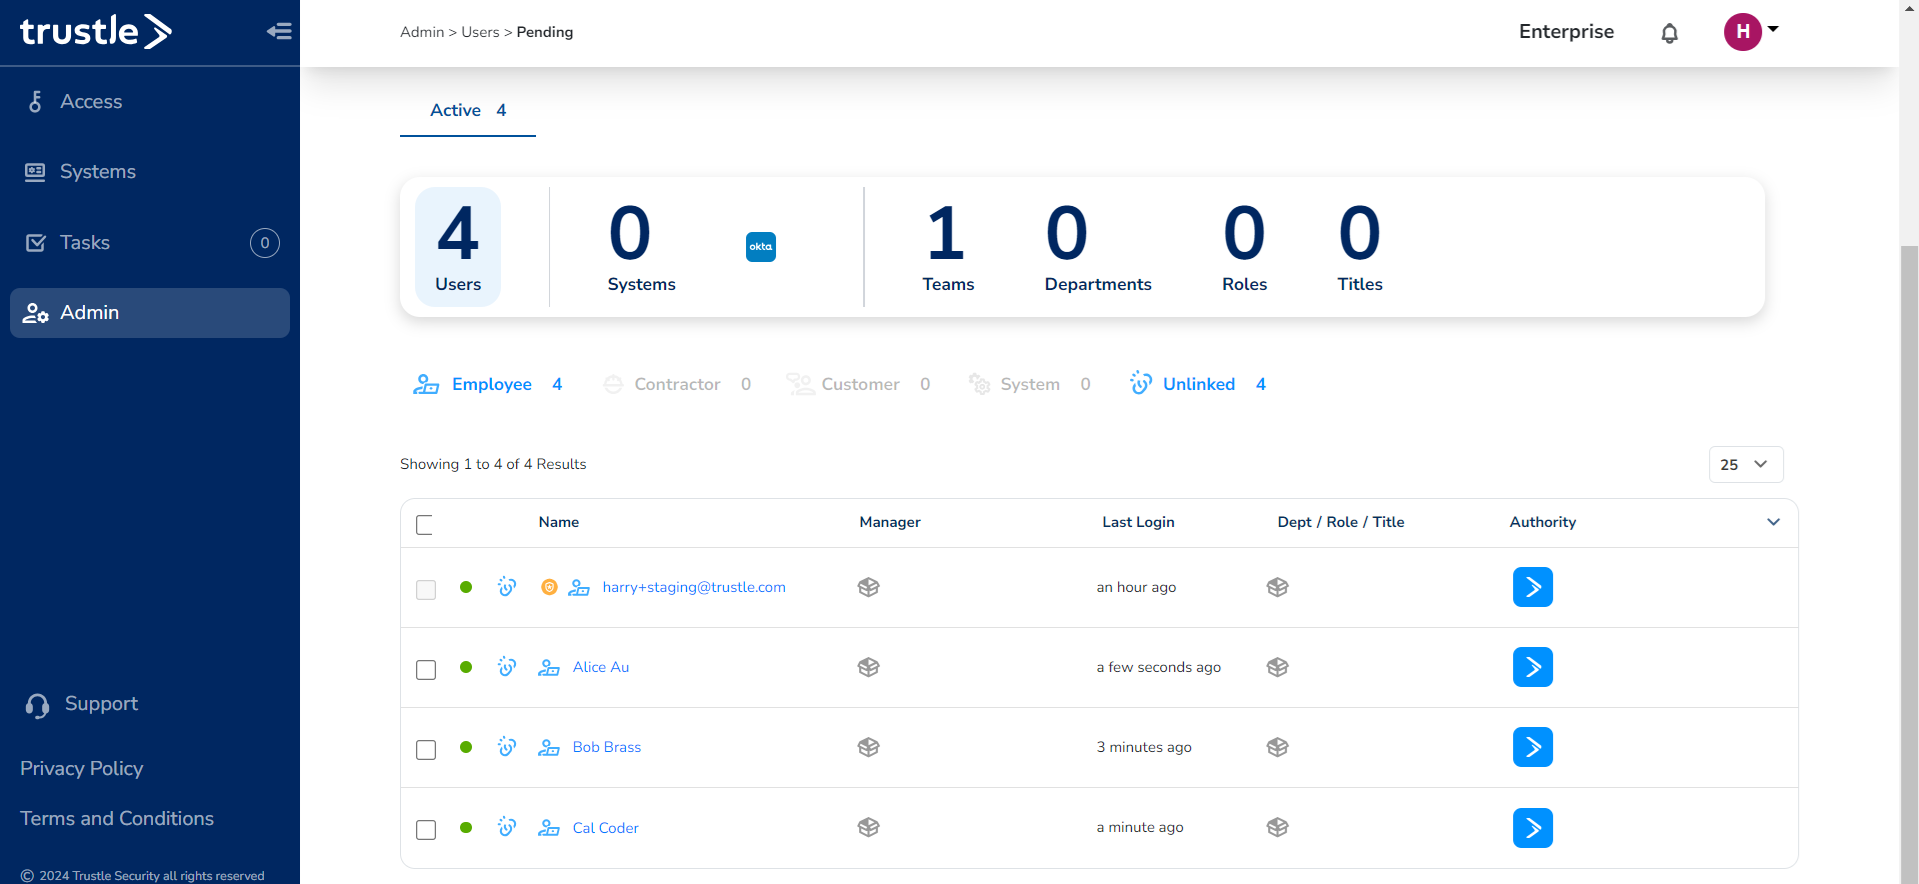
Now Activate these 3 users by sending them an email invite and creating their account. You will get an email in your primary email since each user's email is a redirect to your primary. Click on the email invite and open it in an Incognito window. This will allow you to add a password and complete the user setup without losing your Owner's login on the main Trustle account. Once that is completed, you will see your 3 users become active:
System Import
Now it's time to import our Okta and Azure systems. To complete these steps, please see our previous tutorials on installing Okta and Azure. Please ensure that you have the same 3 users on your Okta and Azure system that you just created in Trustle. These users are Alice Au, Bob Brass, and Cal Coder. They should also have the same emails as above.
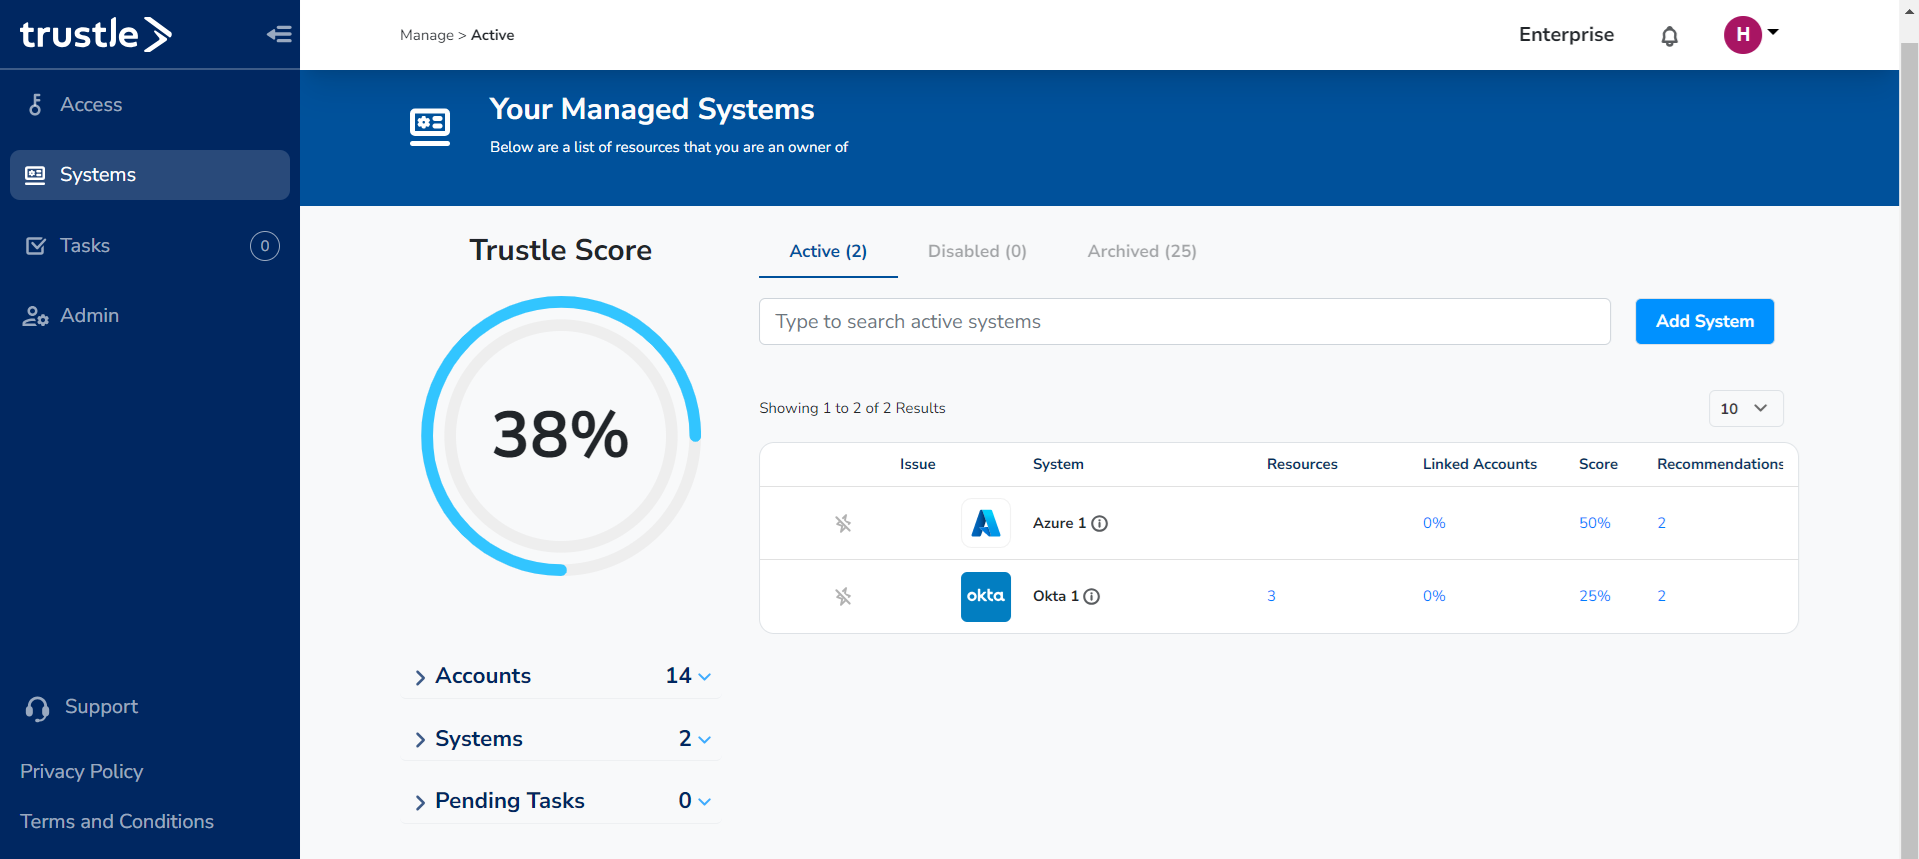
Complete the steps to Import your Okta and Azure systems. You may need to manually import the Azure users into Trustle with the "Import" button in the Settings tab. Once completed, it should look like this on your Systems page:
You will also see the 3 users come in on each system in the Unlinked section. Here is an example from the Okta system. Select the 3 users and click "Link Accounts" to bring them over to the Linked tab. Do this for Okta and Azure.
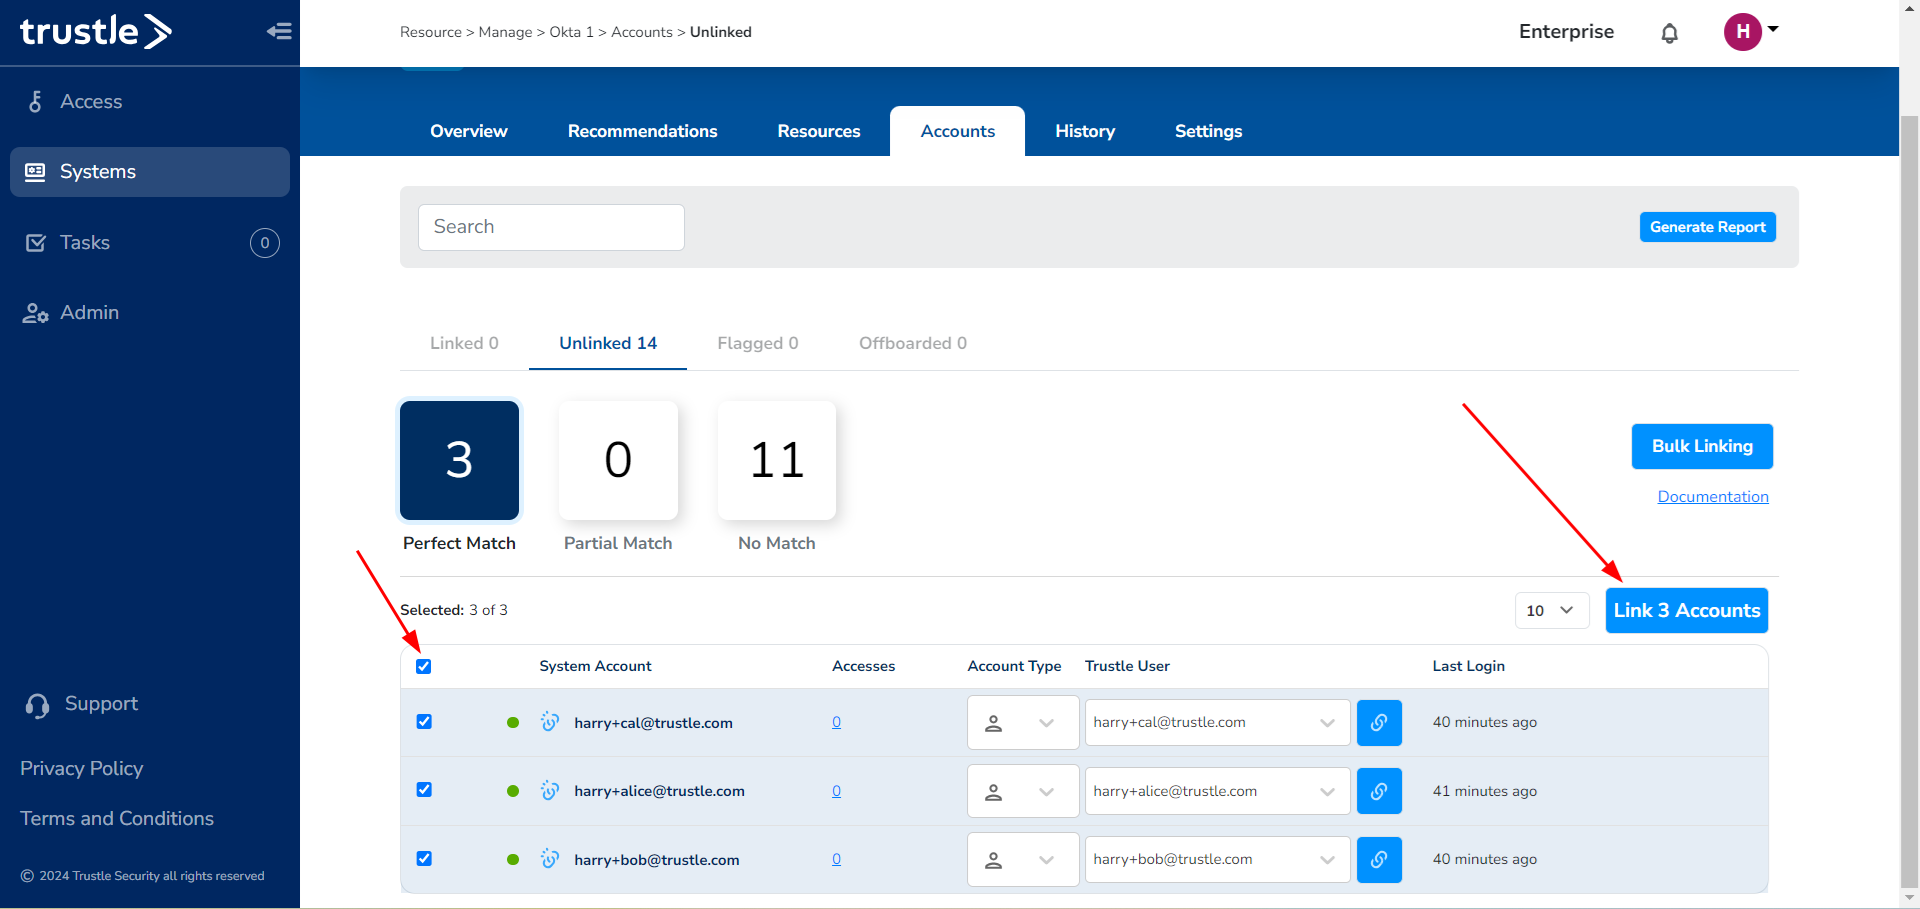
Now these 3 users should appear in the Linked section for Okta and Azure. Your system setup is complete, now we can move on to the Authority!
Okta Authority
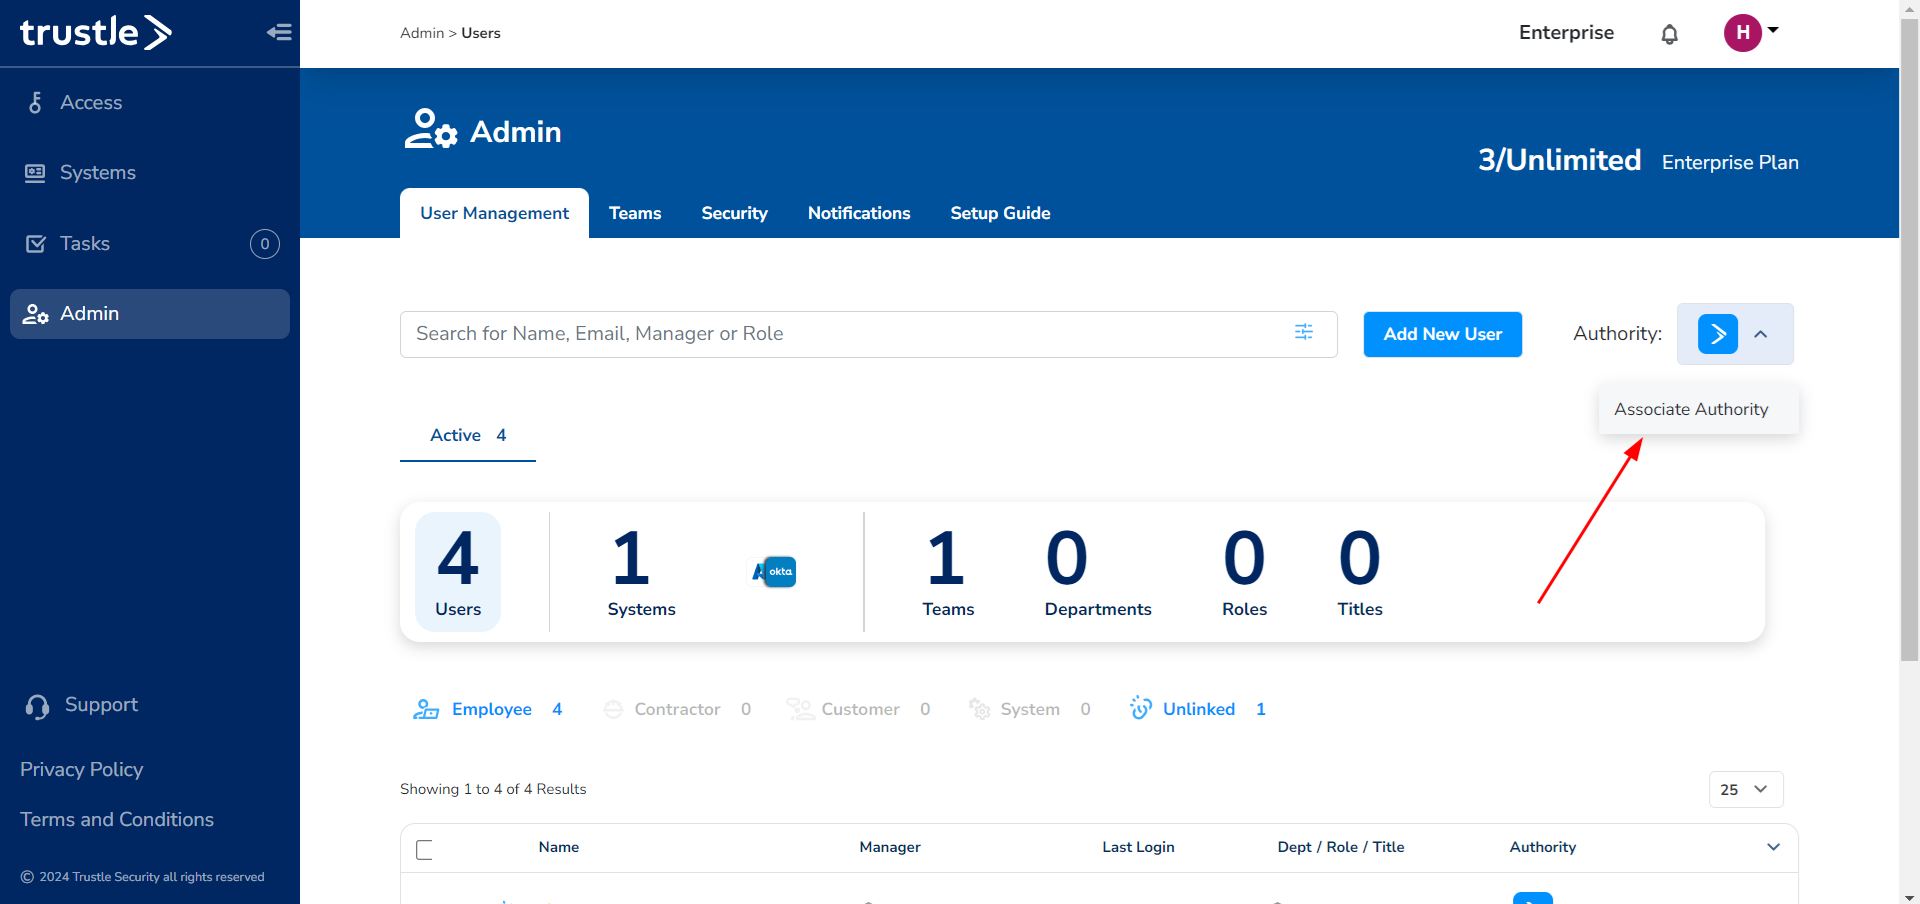
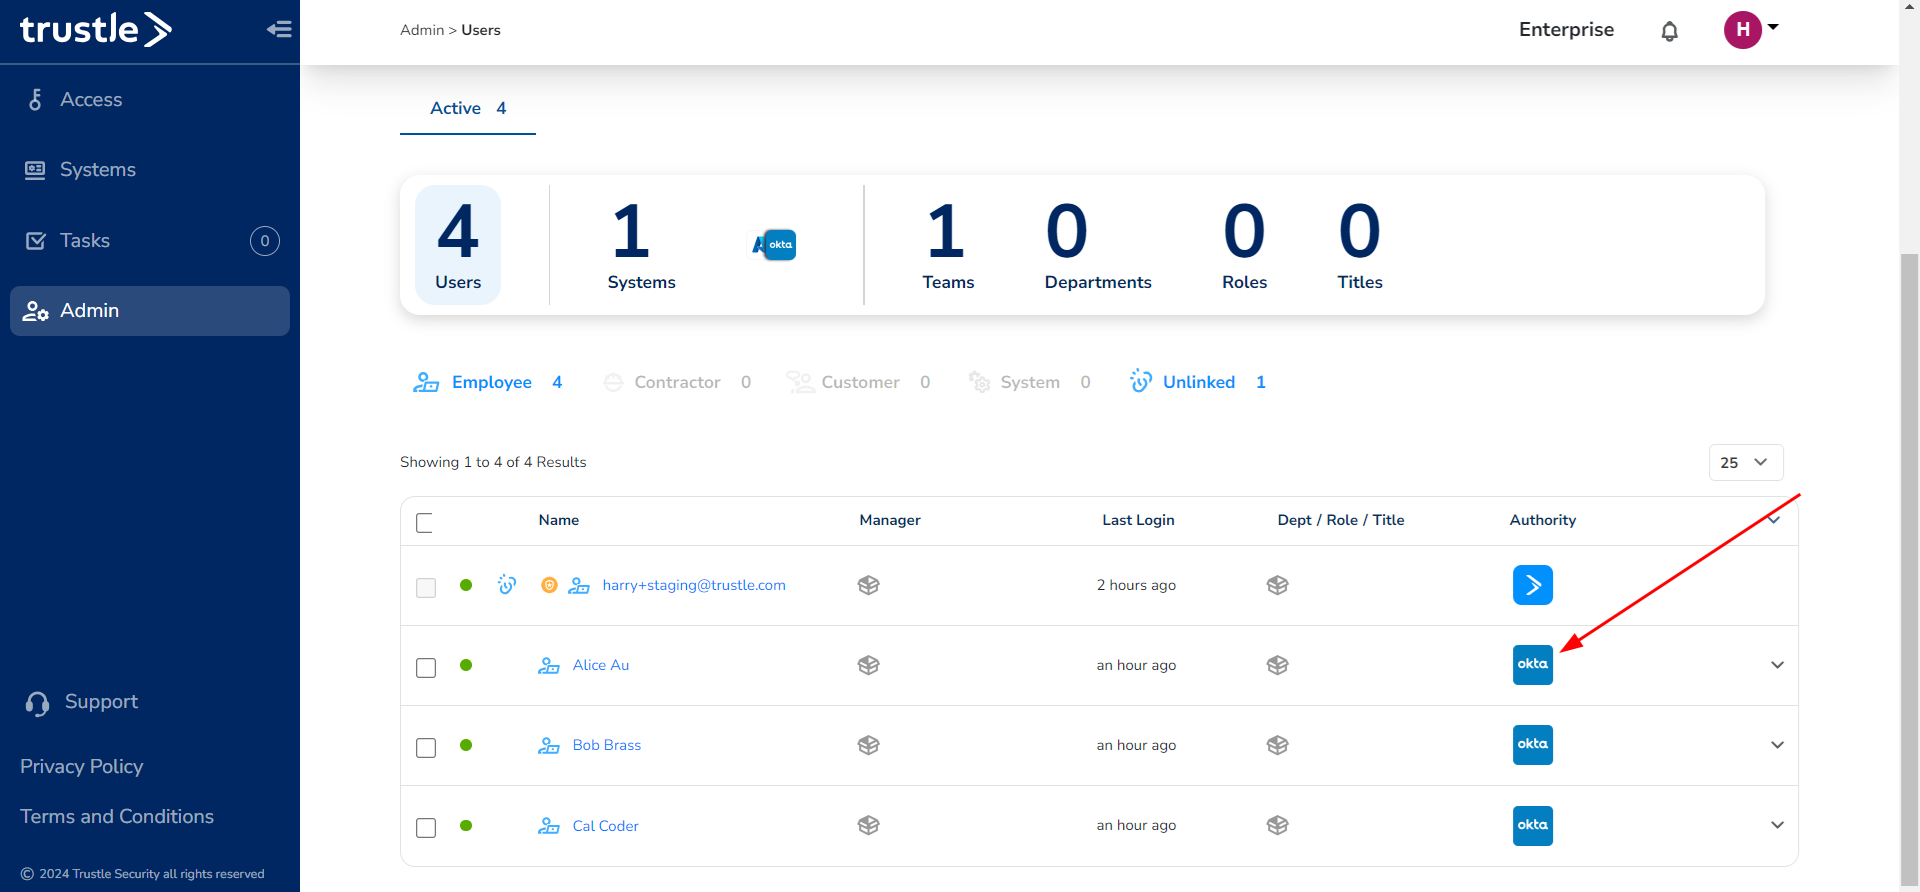
Head over to the Admin tab and notice that all users are under the Trustle Authority. We're going to change this to the Okta Authority first. Click on the "Authority" button on the right side and "Associate Authority" and then select your existing Okta System. This will bring you to the Okta System page where you will click the "Associate" button.
Now head back over to the Admin page and see that Okta is now your Authority. Also notice that your users are still under Trustle Authority. The next step is to sync the Okta Authority to bring your users under Okta Authority.
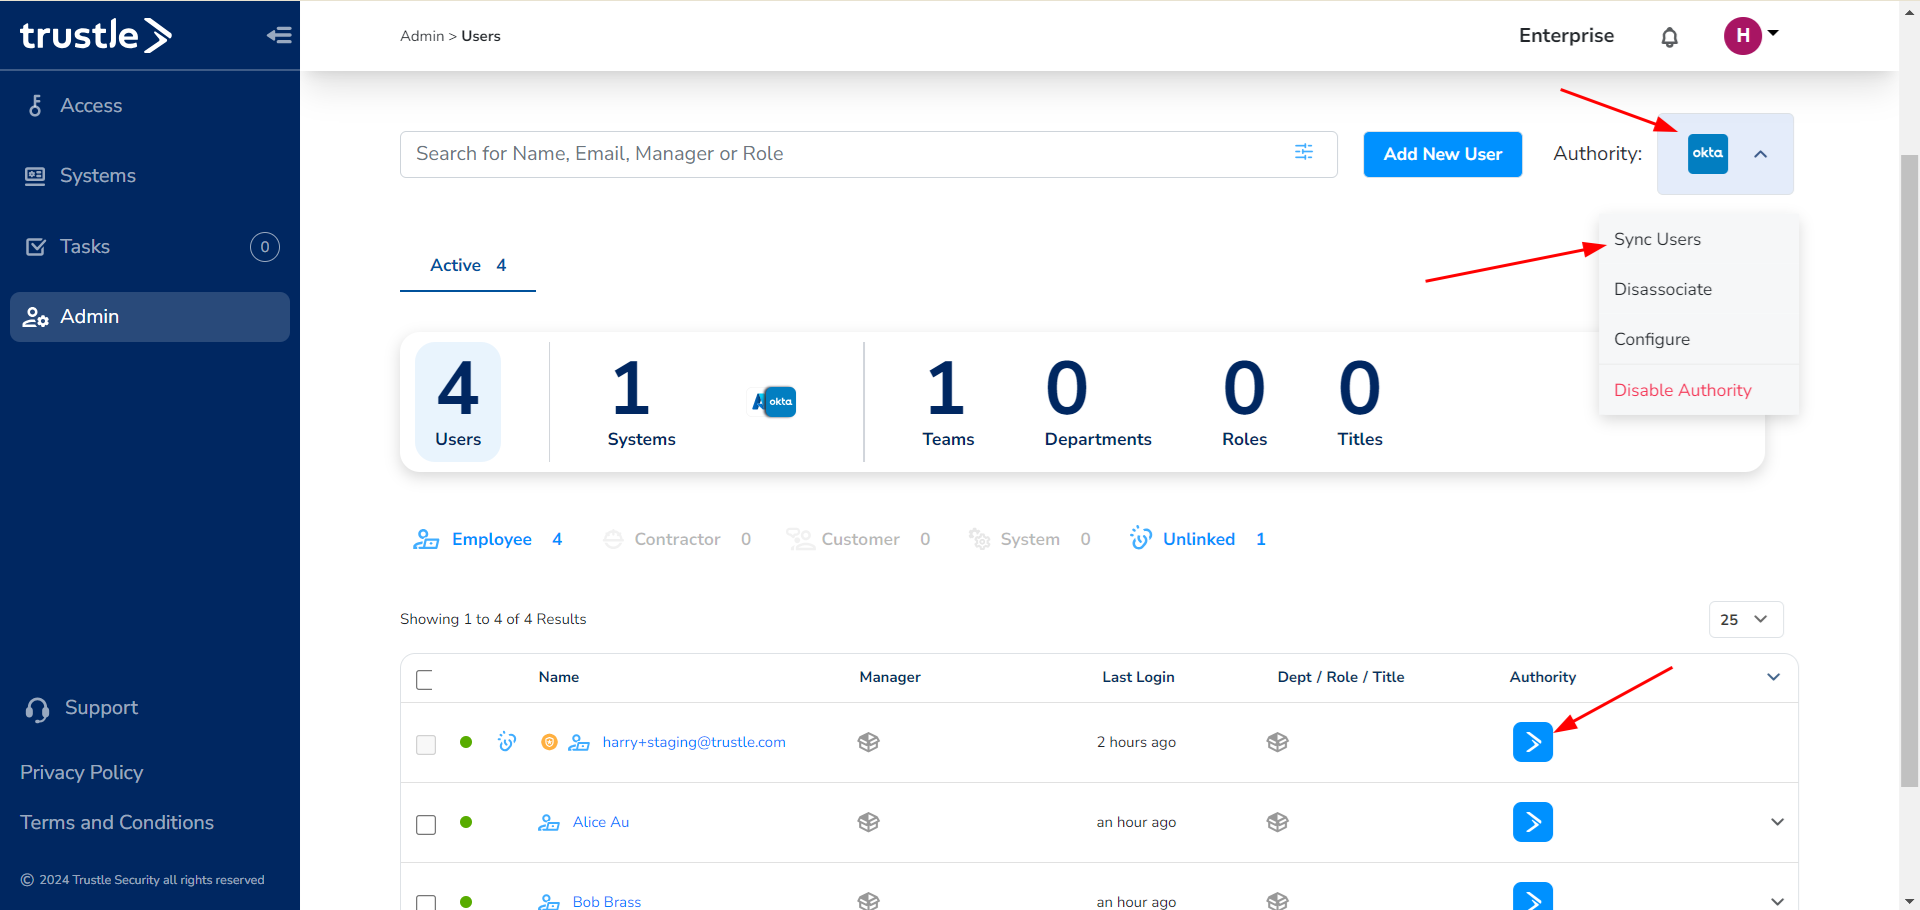
After clicking the Sync Users button, you will see a Pop-Up screen. Click the Sync Now button and notice that your Okta Users will populate the fields. Find your primary 3 users in the Duplicates tab, and highlight them, and click Sync Users at the bottom.
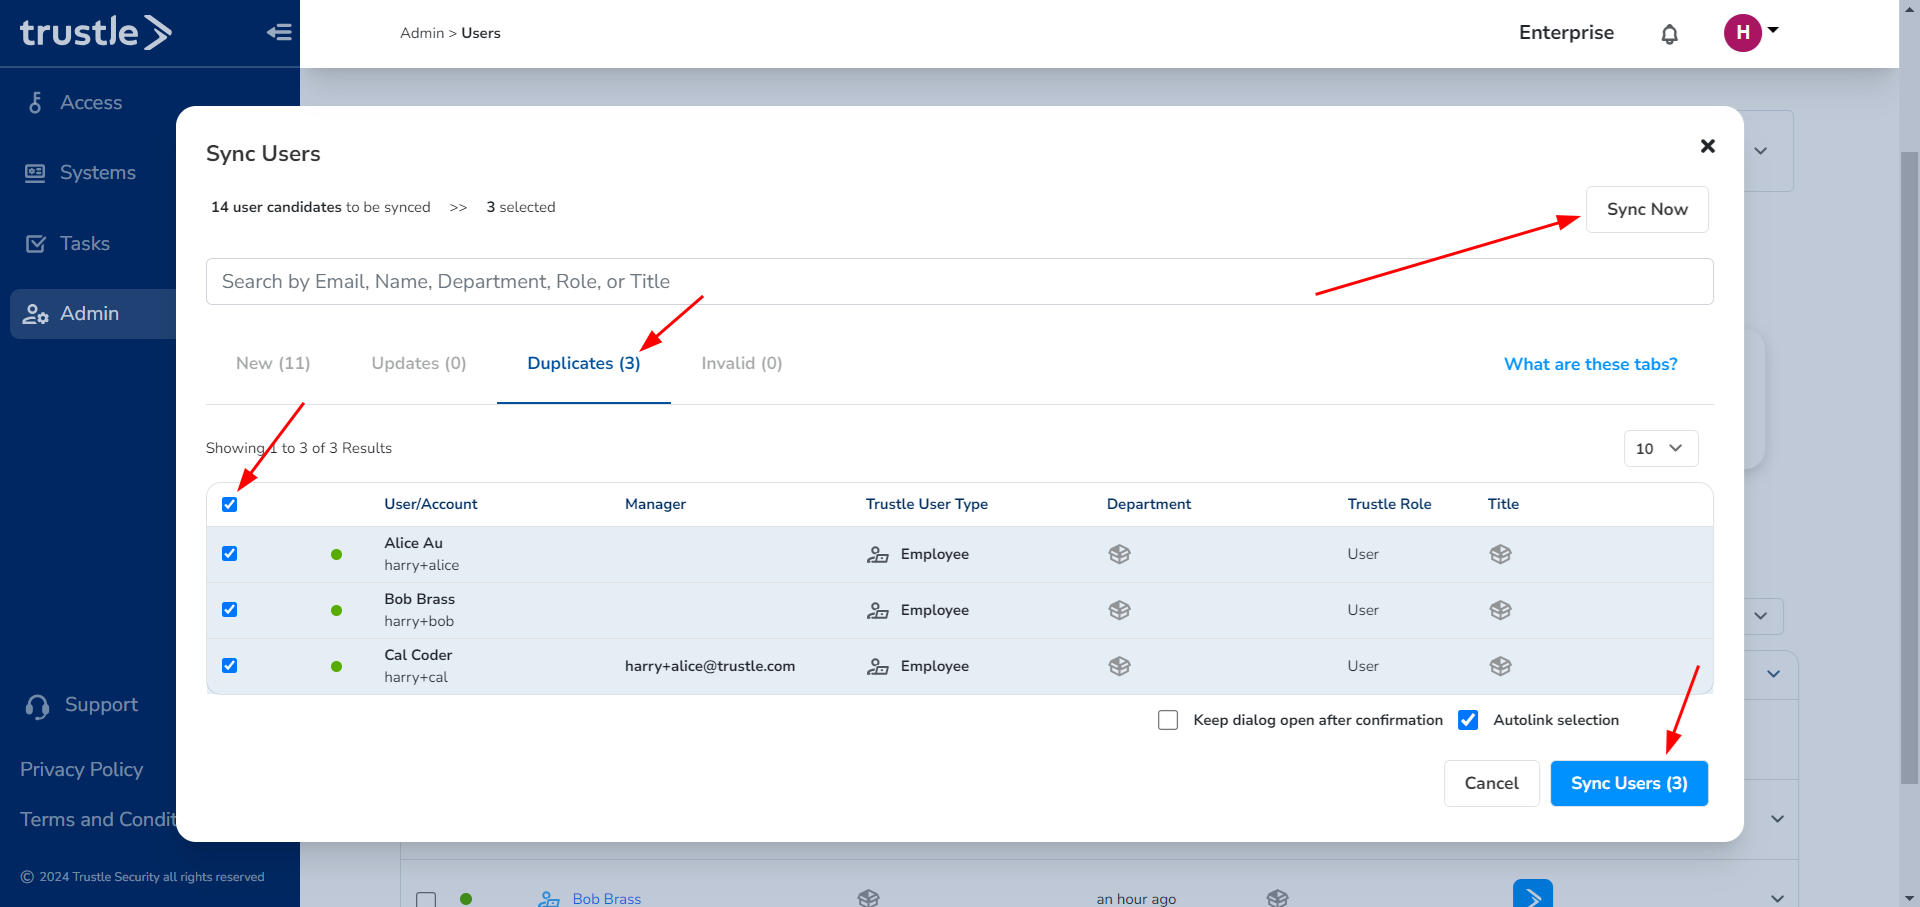
Success! Your Authority is now under Okta, and your Trustle Users are under Okta Authority. This means all changes to your users in Okta will carry over to Trustle.
Azure Authority
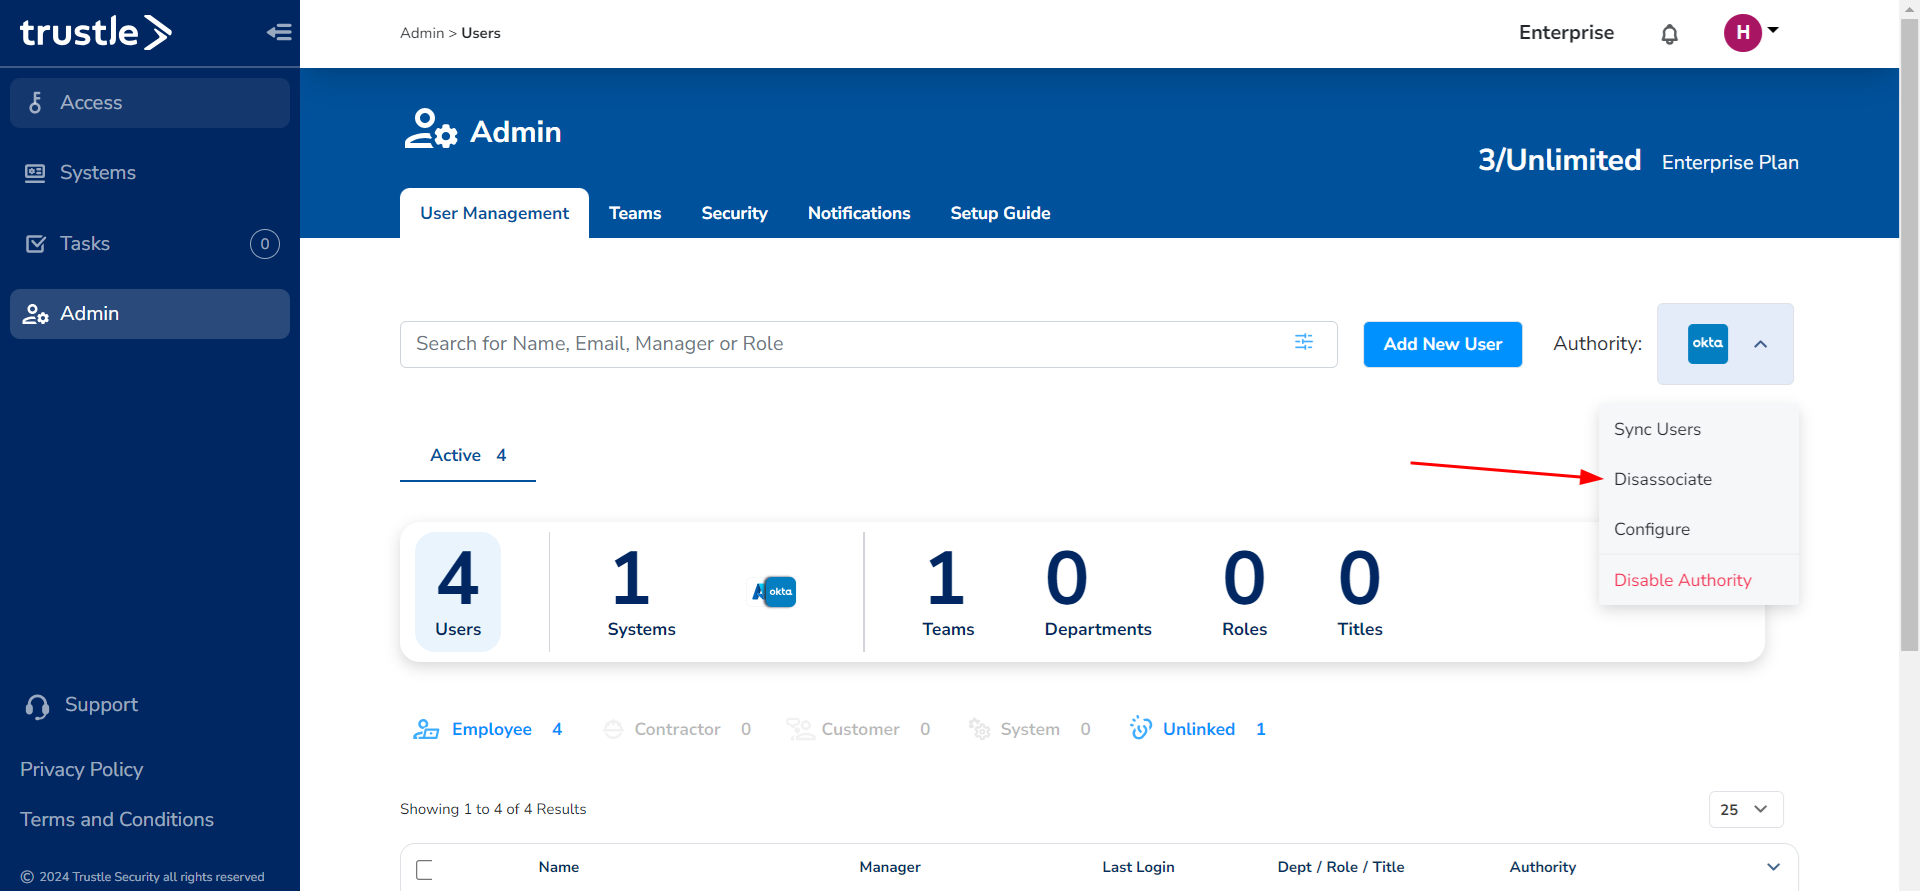
Now let's remove the Okta Authority and change to Azure Authority. Click on the Authority button on the right side again and select "Disassociate" and confirm the disassociation. You will now see your Trustle Users come back to Trustle Authority.
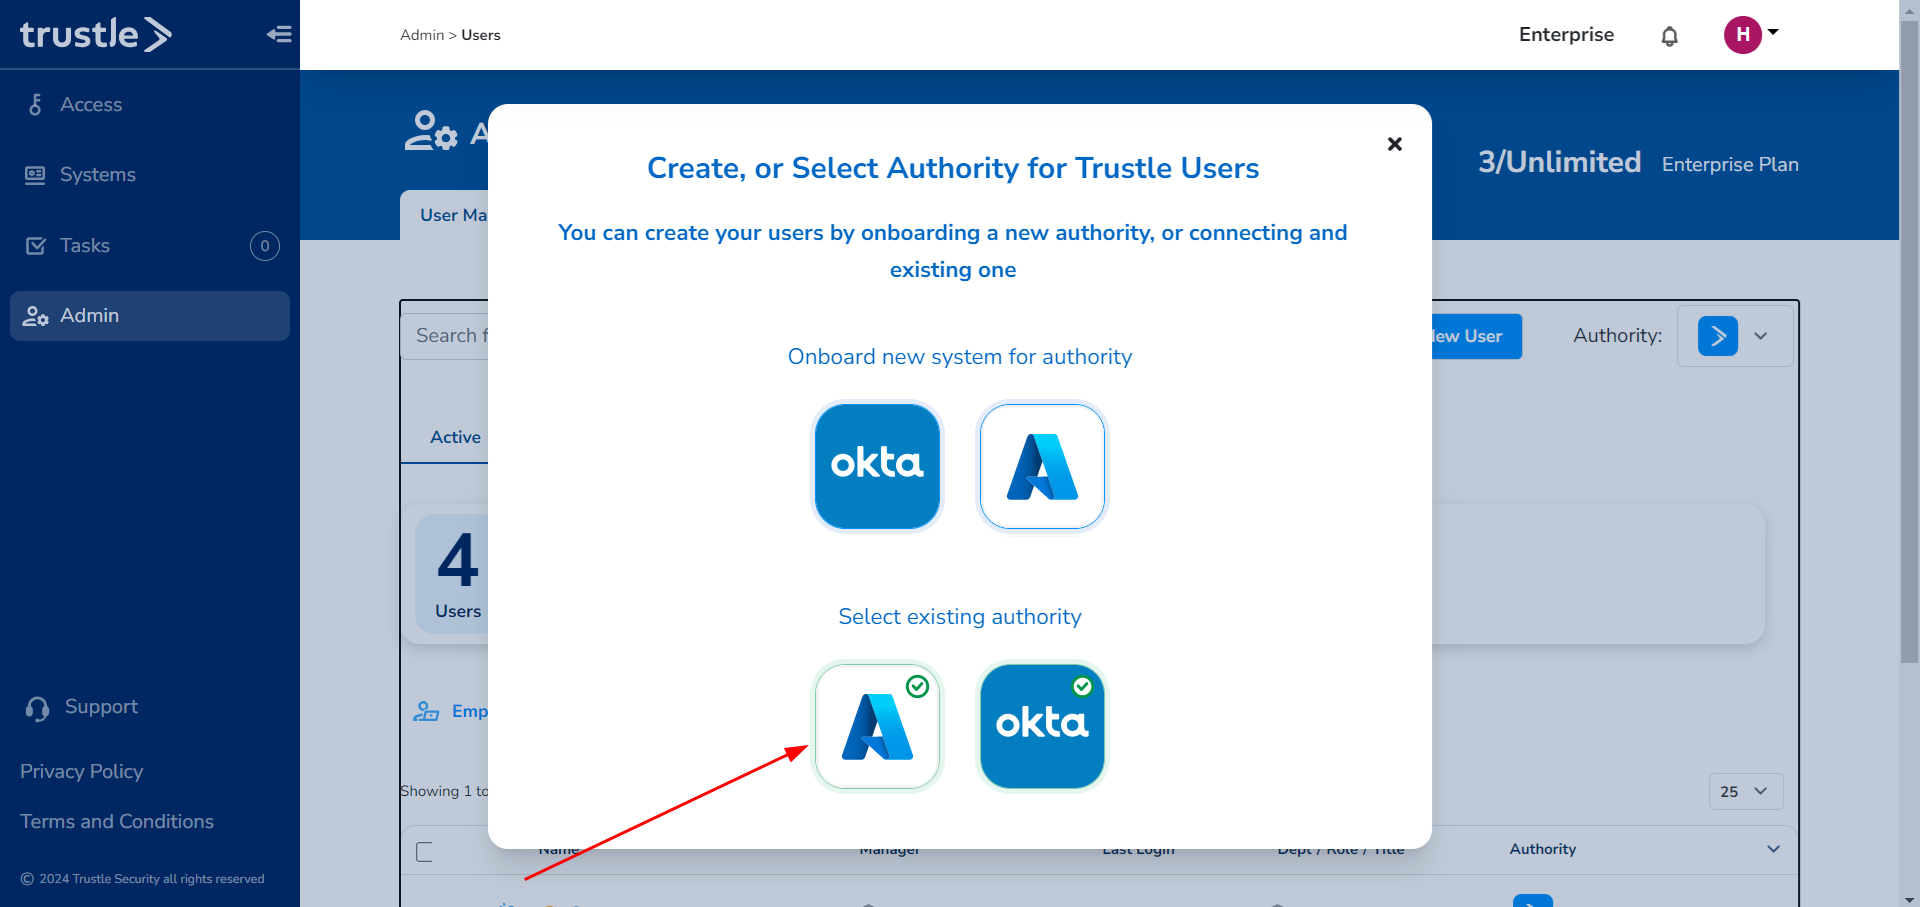
Select the Authority button and select Associate Authority. Then select your current Azure System. This will bring you to the Azure System page. Click on the Associate button and confirm the Authority.
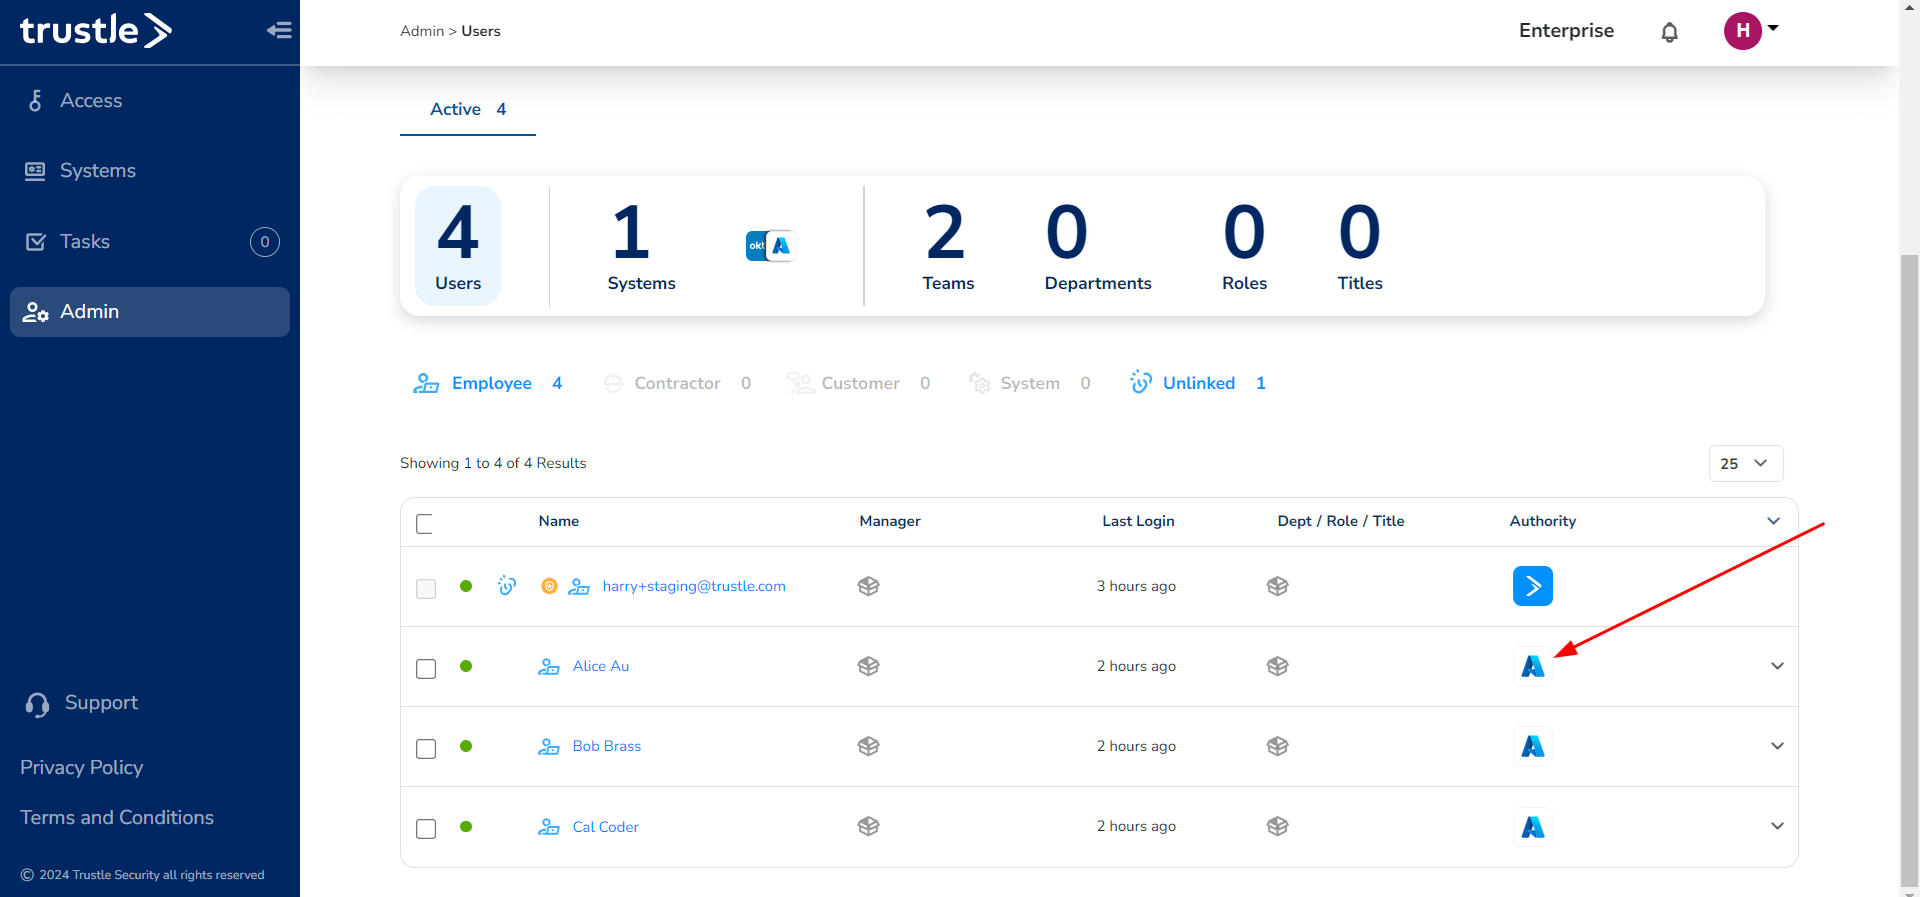
Now when you return to the Admin page, you will see Azure as your Authority. Your users will still be under Trustle Authority. Click the Authority button, and click Sync Users. You will follow the same steps you did for Okta. You will now see the same Pop-Up. Click the Sync Now button to bring in your Azure users. Find them in the Duplicates tab. Highlight these 3 users and click Sync Users. You will now see these users under the Azure Authority!
Manager Rotation
Now that we have learned about rotating between Authorities, let's focus on what happens when we have different managers for each Authority.
- In Okta, set Cal Coder's Manager to Bob Brass.
- In Azure, set Cal Coder's Manager to Alice Au.
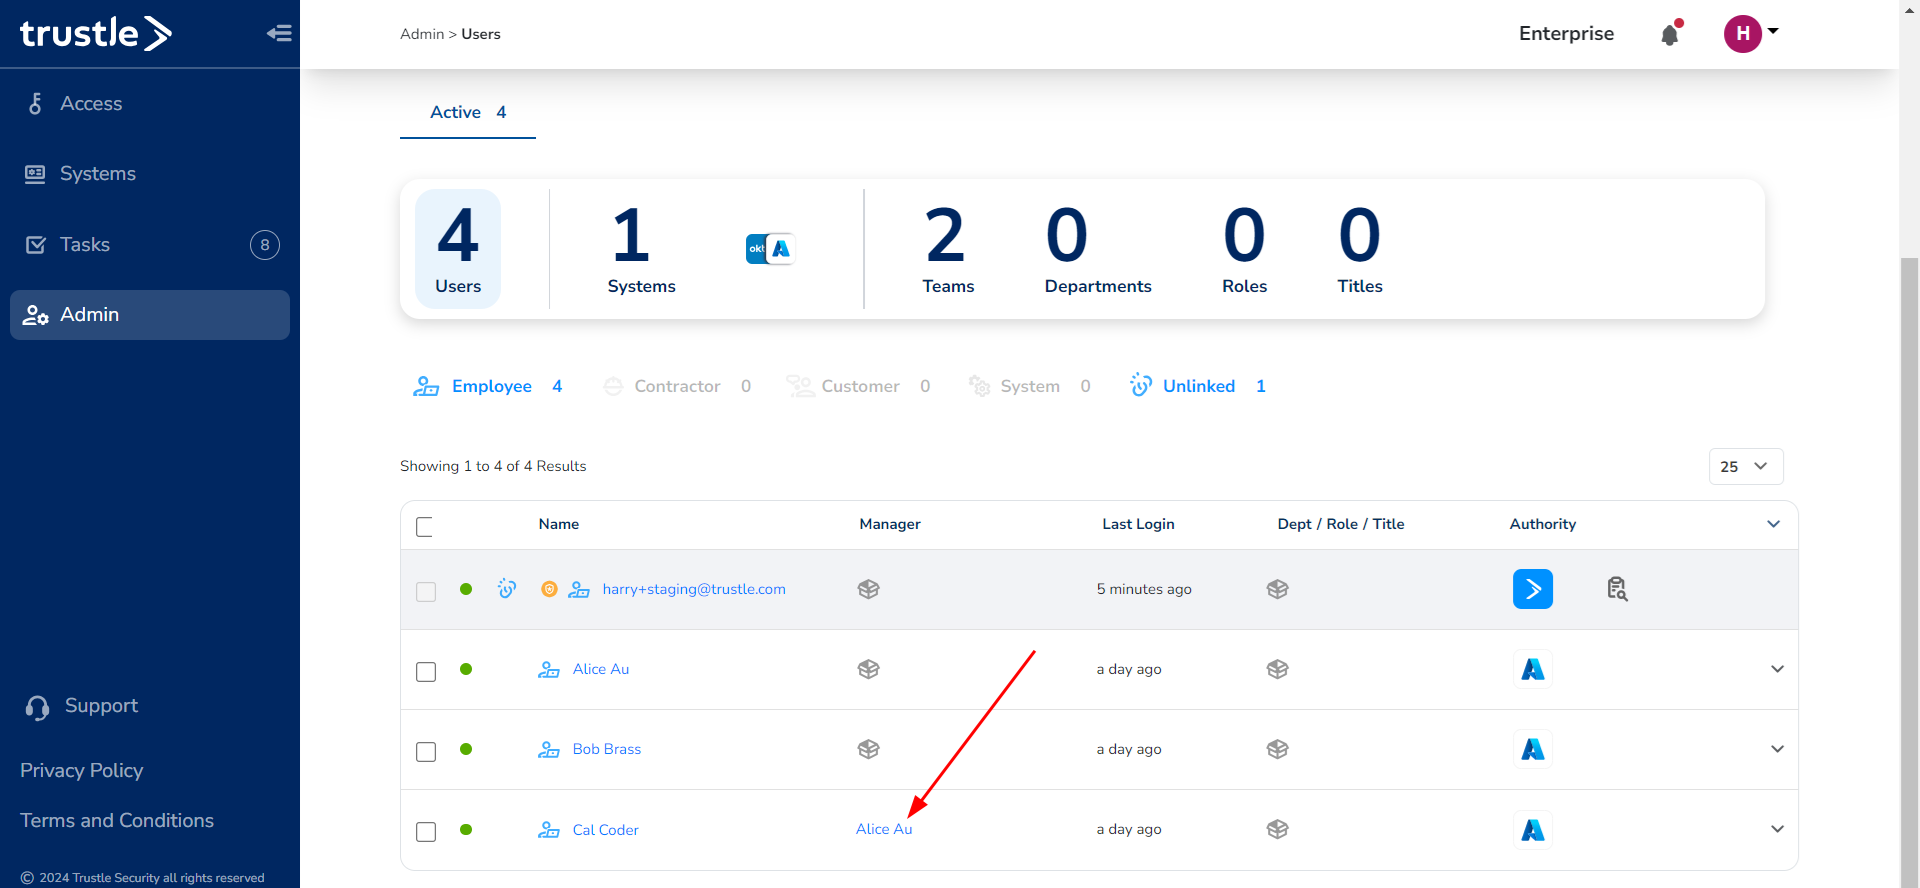
In Trustle, ensure that the Authority is on Azure, and Sync Users like we did above. You will now see that Cal Coder's Manager is Alice Au.
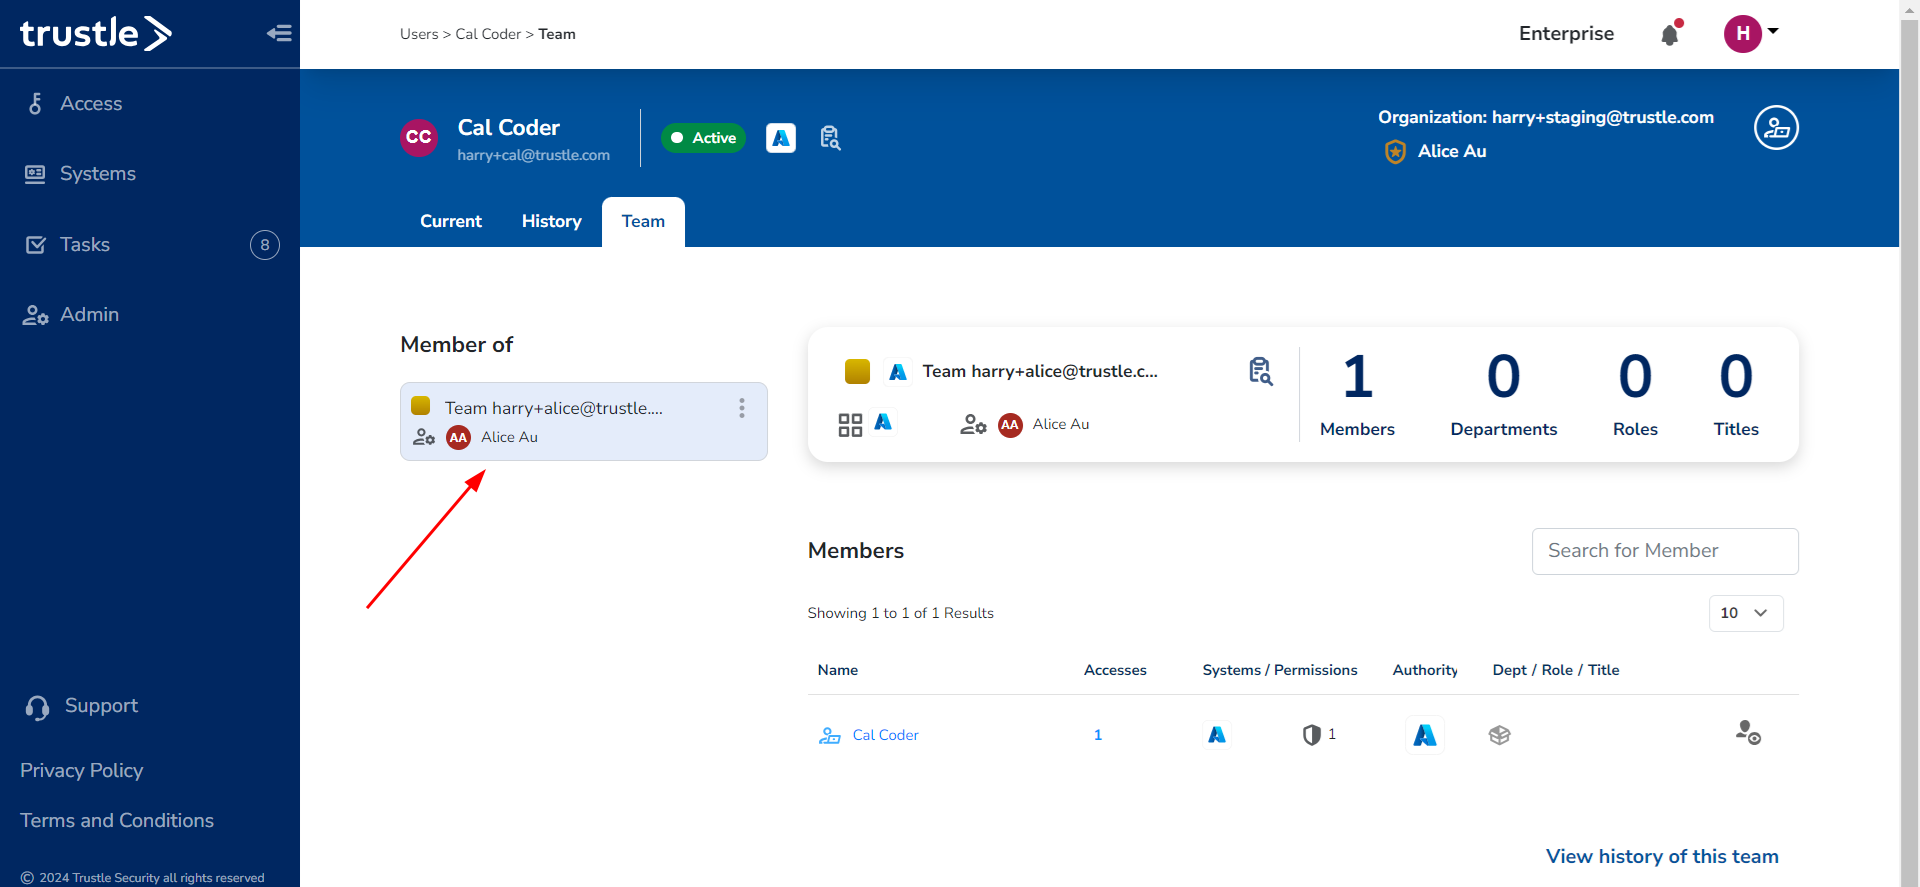
Click into Cal Coder's user profile and select the Team tab. You will also see that he is now a member of Alice's Team. All managers automatically have a team in Trustle.
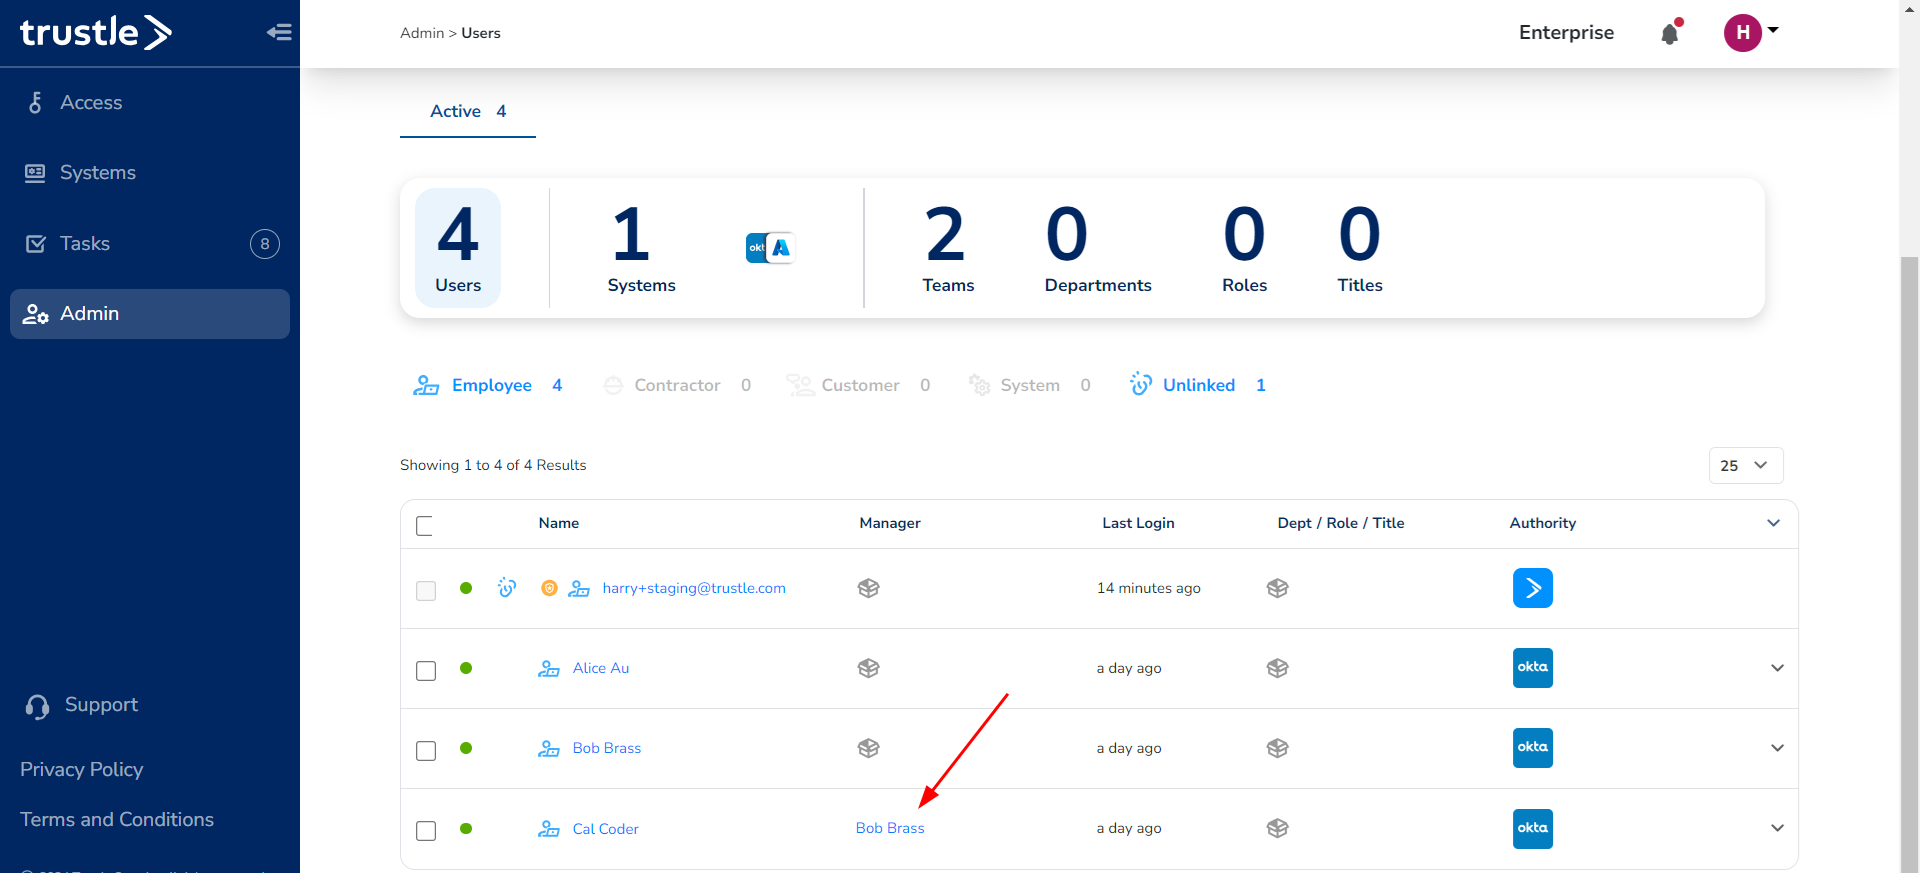
Now let's rotate to the Okta Authority and see what happens to Cal Coder's current Manager. Click on the Admin page and Disassociate the Azure Authority like we did above. Then click on Authority, Associate Authority, and select your Okta System. Click Associate Authority, and head back to the Admin page. Click Authority, Sync Users, Sync Now, highlight your users, and Sync Users. You will now see that Cal Coder's Manager is Bob Brass.
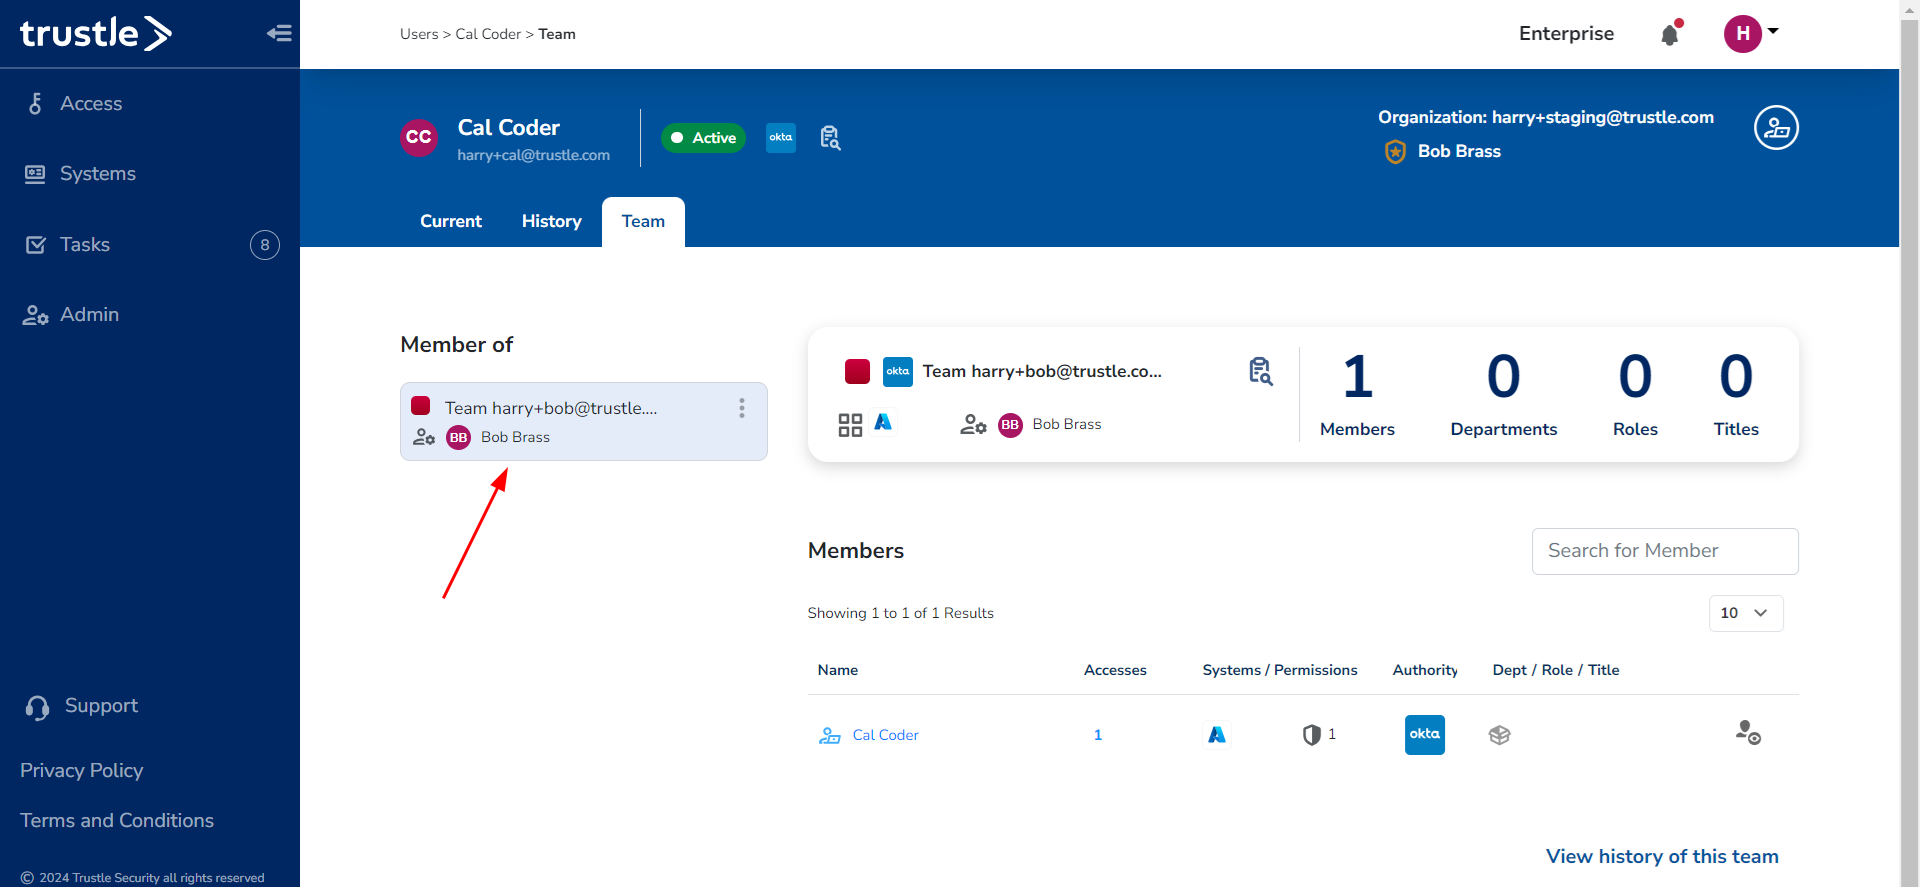
Click into Cal Coder's user profile once again, and click the Team tab. Cal Coder is now a part of Bob Brass' Team.
Now you know how Trustle uses Authority to rotate between Managers!
Field Mapping
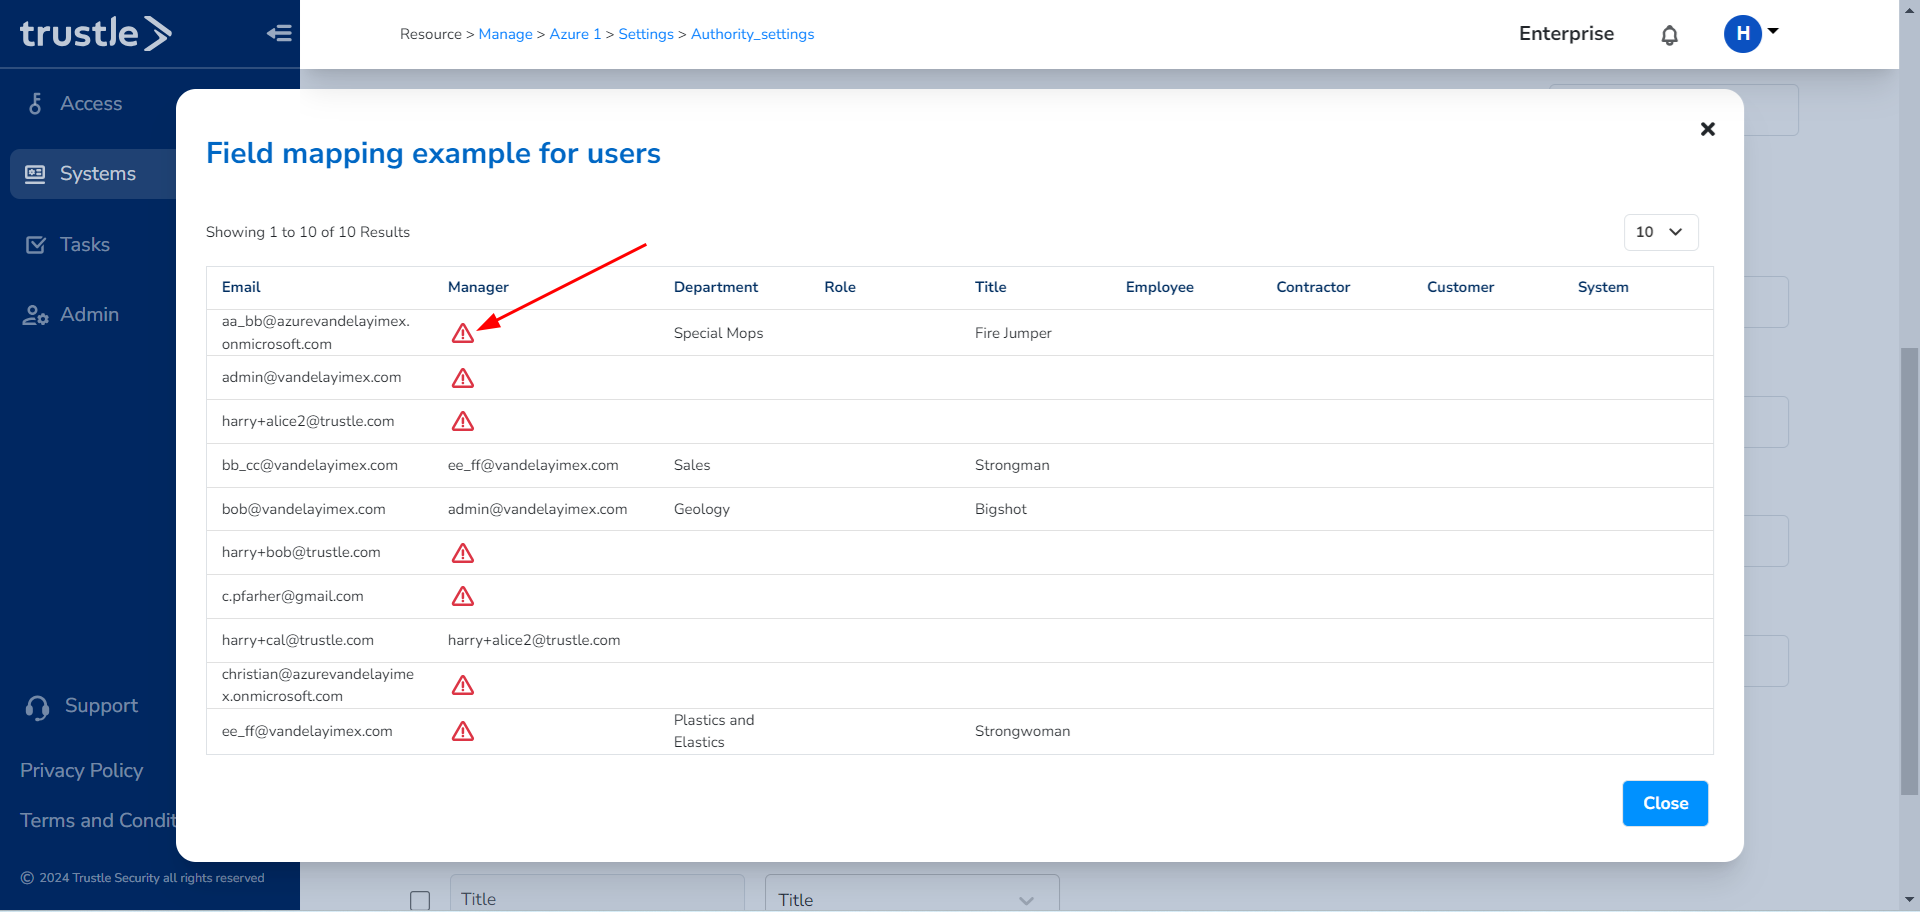
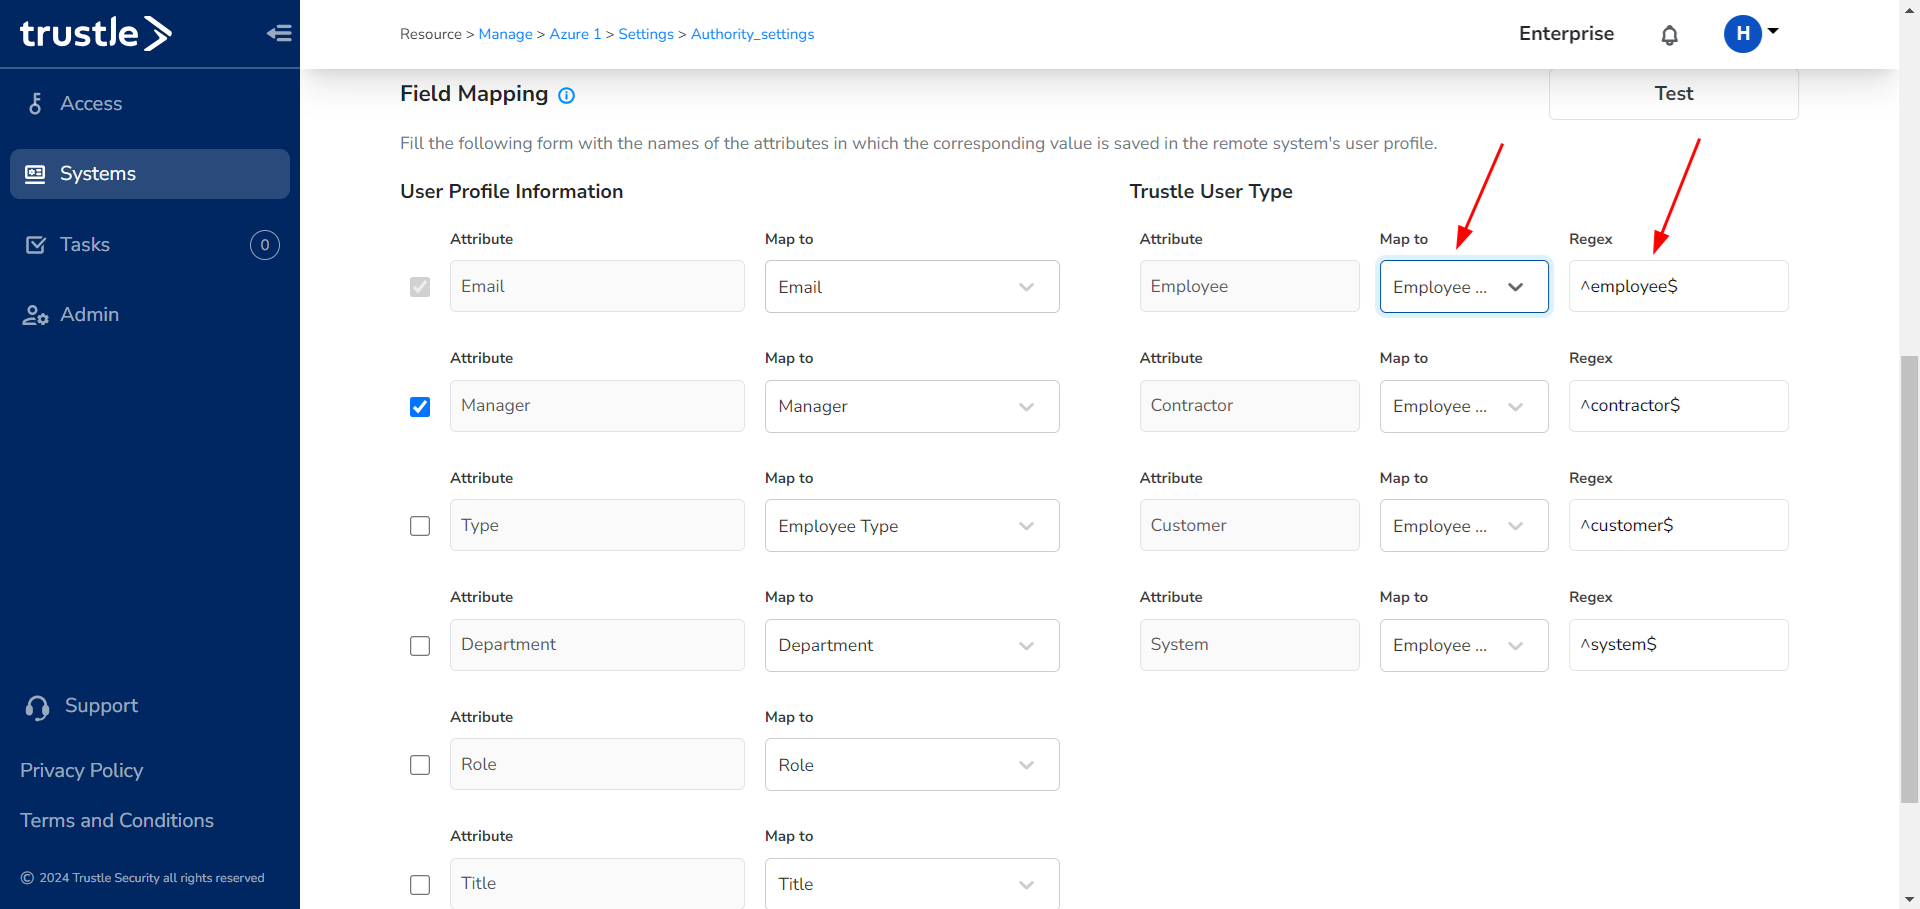
Trustle's Authority settings allow administrators to change the required attributes of the users they create. This is known as the field mapping feature. You can learn more about this in the "Field Mapping" page of the Theory of Operation section. After selecting your authority system, you can choose which fields you would like to map from the system and choose which fields will be required for users. Here is an example where I would like to include the Manager attribute in my required fields for users.

I can then press the Test button to see what this would look like before actually syncing the users. In this example, users without a manager would have a red warning that they will not be brought into Trustle. This confirms that the Field Mapping feature is working successfully. Only users with a manager will be synced.
Trustle also provides a mapping feature for the User Type. On the right side of the screen, you can see 4 different user types and how they will be mapped from the system. For example, the "Employee" attribute will be mapped from "Employee Type" in the System. Trustle will search that System field for the associated Regex that is specified from the administrator. In this example, if the System User has the world "Employee" in the "Employee Type" field, then Trustle will sync that user as an Employee in Trustle. This feature allows administrators the freedom to select which fields to search in and what Regex patterns to use. Another example would be if the company's contractors had the word "contractor" in their email. The administrator could change the Contractor mapping to the email field, and search for the word "contractor" using Regex.
Now you know how to use Trustle's Field Mapping feature!